1. Einleitung
This manual provides instructions for the proper setup, operation, and maintenance of your Traceable High-Accuracy Refrigerator/Freezer Thermometer. This device is designed to monitor temperatures in various environments such as liquids, baths, air/gas, incubators, refrigerators, and freezers. It features a triple display for current, minimum, and maximum temperatures, along with programmable alarms and a stainless steel probe.
2. Produktüberschreitungview
2.1 Funktionen
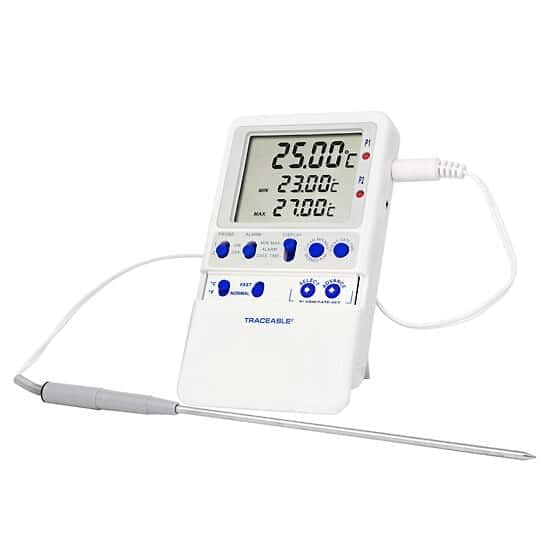
- Dreifachanzeige: Simultaneously shows current, minimum, and maximum temperatures.
- Eingebauter Speicher: Stores minimum and maximum temperatures until manually cleared.
- Precise Temperature Alarms: Allows setting of high and low alarms in 1° increments. An audible alarm activates when temperatures exceed or fall below set points.
- Versatile Probe: Includes a 10-ft (3-m) submersible stainless steel micro-cable probe.
- Mehrere Montageoptionen: Can be mounted using included hook-and-loop strips, wall-mount slots, or the integrated flip-open stand.
- NIST-rückführbare Kalibrierung: Supplied with a NIST-traceable calibration certificate.
2.2 Was ist in der Box?
- Traceable High-Accuracy Refrigerator/Freezer Thermometer unit
- 1 Stainless Steel Probe
- NIST-rückführbares Kalibrierungszertifikat mit Daten
- Kunststoffständer
- Double-back tape and hook-and-loop fastener for mounting
- Zwei AA-Batterien
3. Einrichtung
3.1 Einlegen der Batterie
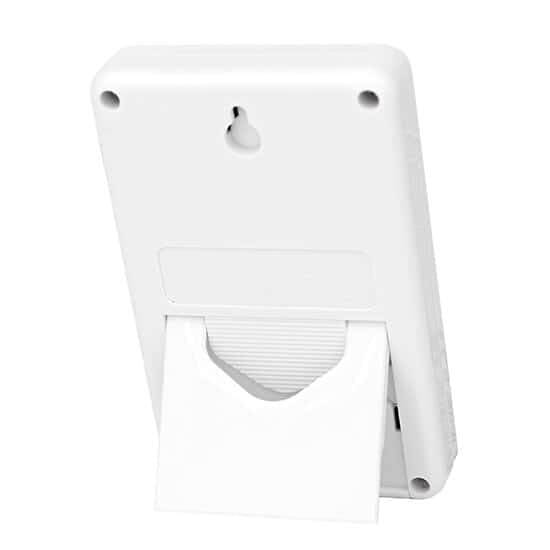
- Suchen Sie das Batteriefach auf der Rückseite des Thermometers.
- Öffnen Sie die Fachabdeckung.
- Legen Sie die beiden AA-Batterien ein und achten Sie dabei auf die richtige Polarität (+/-).
- Schließen Sie den Batteriefachdeckel fest.
3.2 Sondenanschluss und -platzierung
- Connect the stainless steel probe cable to the designated port on the thermometer unit.
- Place the probe in the desired monitoring location (e.g., inside a refrigerator or freezer). The micro-cable design allows doors to close over it without damage.
3.3 Montage der Einheit
The thermometer unit offers several mounting options:
- Benchtop: Use the integrated flip-open stand on the back of the unit to place it on a flat surface.
- Wandhalterung: Utilize the wall-mount slots on the back of the unit with appropriate screws (not included).
- Oberflächenmontage: Apply the provided double-back tape or hook-and-loop fastener to attach the unit to any clean, flat surface.
4. Bedienungsanleitung
4.1 Ein-/Ausschalten
The thermometer typically powers on automatically once batteries are installed. Refer to the unit's buttons for a dedicated power button if available, or it may operate continuously.
4.2 Temperaturablesen
The display simultaneously shows three temperature readings:
- Aktuelle Temperatur: The real-time temperature at the probe's location.
- Minimum Temperature (MIN): Die niedrigste seit dem letzten Reset gemessene Temperatur.
- Maximum Temperature (MAX): Die höchste seit dem letzten Reset gemessene Temperatur.
4.3 Clearing Memory (MIN/MAX)
To clear the stored minimum and maximum temperature readings, press the designated "CLEAR" or "RESET" button on the unit. This will reset the MIN/MAX values to the current temperature, allowing for a new monitoring period.
4.4 Alarme einstellen
The thermometer allows you to set high and low temperature alarms:
- Press the "ALARM SET" button (or similar) to enter alarm setting mode.
- Use the "UP" and "DOWN" arrows (or similar buttons) to adjust the desired high temperature limit.
- Press "ALARM SET" again to confirm the high limit and proceed to set the low temperature limit.
- Adjust the low temperature limit using the "UP" and "DOWN" arrows.
- Press "ALARM SET" one more time to save the settings and exit alarm mode.
- When the temperature goes above the high limit or below the low limit, an audible alarm will sound. The alarm will continue until acknowledged or the temperature returns to the non-alarm range.
4.5 Auswahl der Temperatureinheit (°C/°F)
To switch between Celsius (°C) and Fahrenheit (°F), locate and press the "°C/°F" button on the unit. The display will update to show temperatures in the selected unit.
5. Wartung
5.1 Reinigung
To clean the thermometer unit and probe, wipe them with a soft, damp cloth. Do not immerse the main unit in water. The stainless steel probe is submersible and can be cleaned with mild soap and water. Avoid using abrasive cleaners or solvents.
5.2 Batteriewechsel
When the display becomes dim or the unit stops functioning, it is time to replace the batteries. Follow the battery installation steps in Section 3.1.
5.3 Kalibrierung
The thermometer comes with a NIST-traceable calibration certificate. Regular calibration checks are recommended to ensure continued accuracy, especially in critical applications. Refer to the calibration certificate for details on traceability and recommended recalibration intervals. For recalibration services, contact Traceable customer support.
6. Fehlerbehebung
- Kein Display/Gerät schaltet sich nicht ein: Überprüfen Sie den Batterieeinbau und stellen Sie sicher, dass die Batterien neu sind. Tauschen Sie sie gegebenenfalls aus.
- Ungenaue Messwerte: Ensure the probe is correctly positioned and fully immersed in the substance being measured (if applicable). Verify the probe cable is securely connected. Consider recalibration if accuracy issues persist.
- Alarm ertönt nicht: Check alarm settings to ensure they are correctly configured. Verify the alarm volume is not muted or set too low (if applicable).
- Unregelmäßige Messwerte: This may indicate a loose probe connection or a damaged probe. Reconnect the probe or contact support for a replacement.
7. Spezifikationen
| Spezifikation | Detail |
|---|---|
| Modellnummer | AO-94460-parent |
| Marke | VERFOLGBAR |
| Besonderheit | Hohe Genauigkeit |
| Anzeigetyp | Digitales |
| Außenmaterial | Stainless Steel (Probe) |
| Stromquelle | Batteriebetrieben (2 AA-Batterien im Lieferumfang enthalten) |
| Hinweise zur Produktpflege | Gefriergeeignet, abwischbar |
| Spezifikation erfüllt | NIST |
| Sondenkabellänge | 10-ft (3-m) |
| Verpackungsabmessungen | 10.3 x 3.7 x 3.7 Zoll |
| Artikelgewicht | 7.83 Unzen |
8. Garantie und Support
8.1 Garantieinformationen
Specific warranty details for this product are typically provided at the time of purchase or can be obtained directly from the manufacturer, TRACEABLE (an Antylia Scientific company). Please retain your proof of purchase for warranty claims.
8.2 Kundendienst
For technical assistance, troubleshooting beyond this manual, or inquiries regarding calibration services and replacement parts, please contact TRACEABLE customer support. Contact information can usually be found on the manufacturer's webauf der Website oder auf der Produktverpackung.


