1. Einleitung
This manual provides comprehensive instructions for the installation, operation, and maintenance of your REOLINK RP-WCB8MZ 4K Wi-Fi 6 Outdoor Security Camera. Please read this manual thoroughly before using the product to ensure proper setup and functionality. Keep this manual for future reference.
2. Produktüberschreitungview
The REOLINK RP-WCB8MZ is a high-performance 4K outdoor security camera featuring Wi-Fi 6 connectivity, 5X optical zoom, and advanced AI detection capabilities. It is designed for reliable outdoor surveillance with IP67 waterproofing.
2.1 Kamerakomponenten
Familiarize yourself with the various parts of your security camera:

Bildbeschreibung: A detailed diagram illustrating the REOLINK RP-WCB8MZ camera and its various components. Labels point to the CDS Sensor, Infrared LED, Spotlight, Lens, Aperture Hood, Microphone, Speaker, Antenna, Mounting Bracket, microSD Card Cover, Alarm Input/Output, Power Port, Reset Button, and Network Port.
- CDS-Sensor: Detects ambient light levels for automatic day/night mode switching.
- Infrarot-LED: Provides illumination for black and white night vision.
- Scheinwerfer: Aktiviert die Farbnachtsicht und die Abschreckungswirkung.
- Linse: Nimmt Videoaufnahmen auftage.
- Aperture Hood: Protects the lens and reduces glare.
- Mikrofon: Erfasst Audio für die Zwei-Wege-Kommunikation und Aufzeichnung.
- Lautsprecher: Enables two-way audio and plays custom voice alerts.
- Antenne: Für WLAN-Verbindungen.
- Montagehalterung: Used for secure installation on walls or ceilings.
- microSD Card Cover: Protects the microSD card slot.
- Alarmeingang/-ausgang: Zum Anschluss externer Alarmgeräte.
- Stromanschluss: Wird mit dem Netzteil verbunden.
- Reset-Taste: Dient zum Wiederherstellen der Werkseinstellungen.
- Netzwerkanschluss: Für kabelgebundene Netzwerkverbindung (optional).
3. Hauptmerkmale
- 4K/8MP Resolution with 5X Optical Zoom: The camera delivers 4K (8-megapixel) video resolution, providing clear and detailed images. The 5X optical zoom allows for magnification of distant objects without loss of clarity.
- Farbnachtsicht: Equipped with spotlights, the camera can capture full-color video even in low-light conditions, enhancing visibility and detail at night.
- Intelligente KI-Erkennung: The camera can intelligently distinguish between humans, vehicles, and animals, reducing false alarms caused by irrelevant movements. It also supports package detection and detection of non-motorized objects.
- Perimeterschutz: Configure specific detection zones such as line crossing, zone intrusion, and zone loitering to monitor critical areas. Note: Perimeter settings are currently managed via the Reolink App.
- Local AI Video Search: Utilize descriptive keywords to quickly find specific event-based footage stored locally.
- Dualband-WLAN 6: Supports both 2.4GHz and 5GHz Wi-Fi bands, offering stable and fast wireless connectivity. 5GHz provides higher speeds in open areas, while 2.4GHz offers better penetration through walls.
- Flexible Aufnahmeoptionen: Supports recording to a microSD card (up to 512GB), a Reolink NVR (Network Video Recorder), or an FTP server for continuous 24/7 recording without subscription fees.
- Zweiwege-Audio: Das eingebaute Mikrofon und der Lautsprecher ermöglichen die Echtzeitkommunikation über die Kamera.
- IP67 Wasserdicht: Designed to withstand outdoor weather conditions, ensuring durability and reliable operation.

Bildbeschreibung: A split image demonstrating the clarity of 4K/8MP resolution and the detail captured with 5X optical zoom. The top panel shows a wide street view in 4K, while the bottom panel shows a zoomed-in section of a storefront with 5X optical zoom, highlighting fine details.

Bildbeschreibung: A screenshot from the Reolink app showing a vivid color night vision view of an outdoor scene with people near a building. The image demonstrates the camera's ability to capture colors in dark environments.
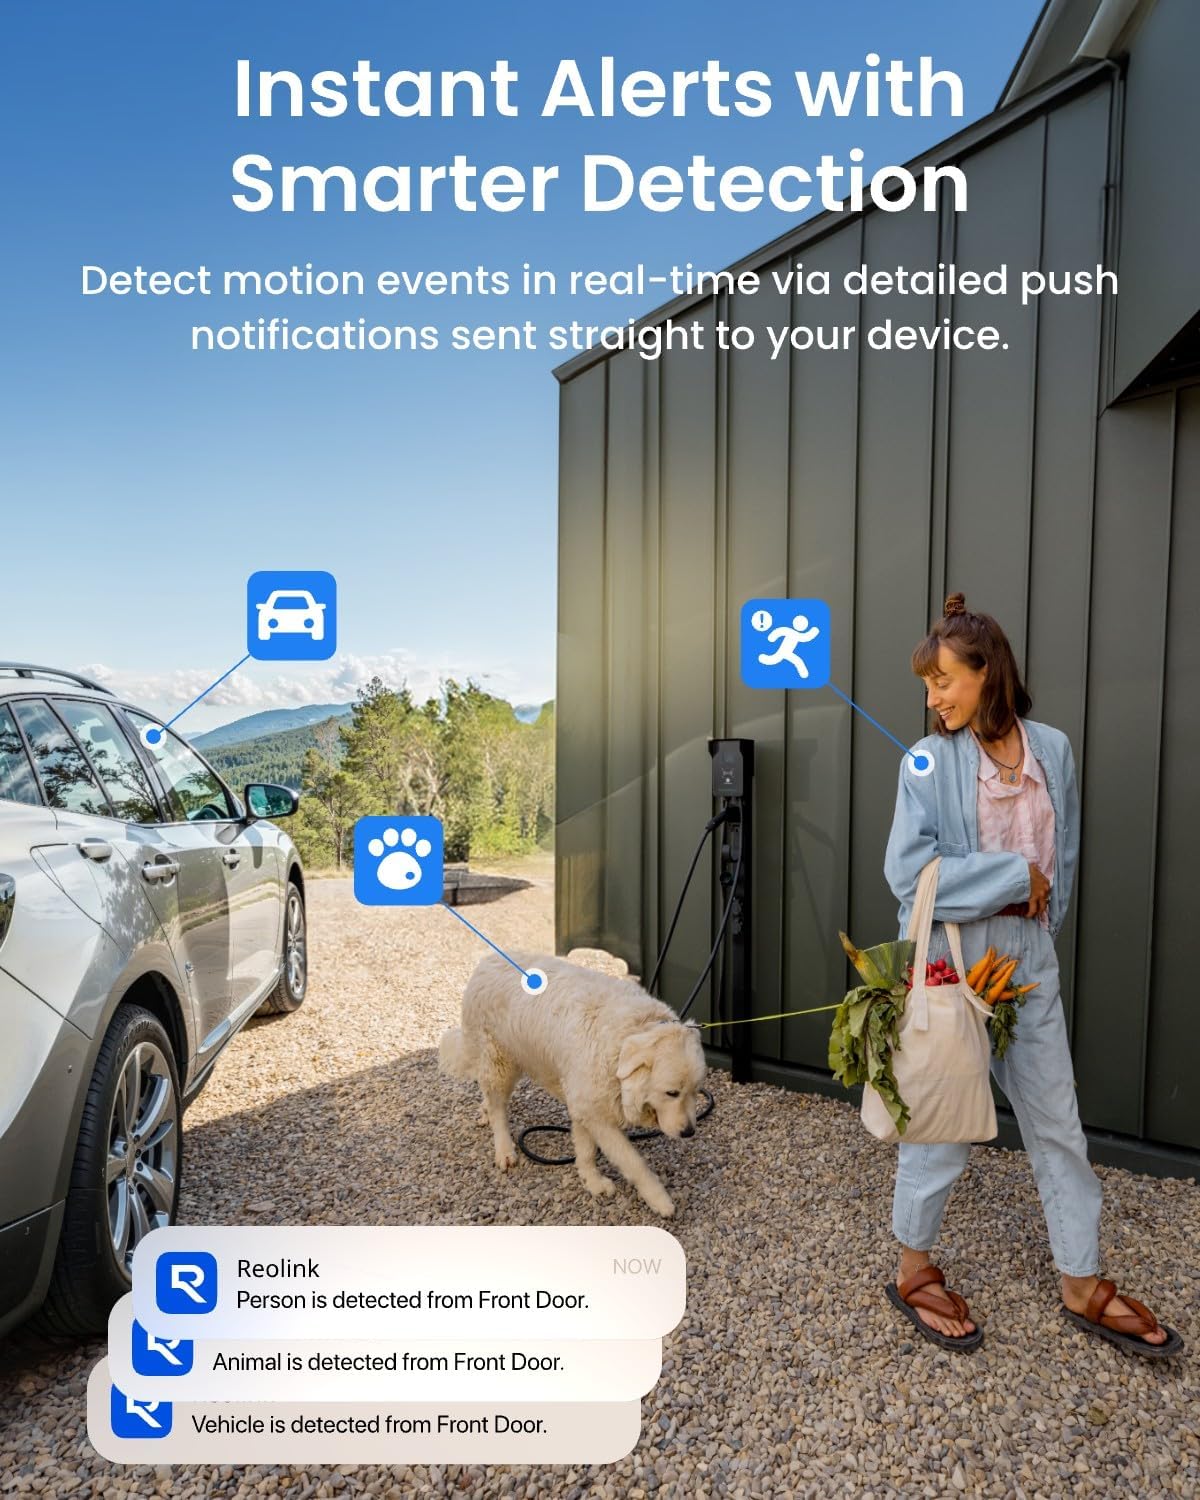
Bildbeschreibung: An illustration showing the camera detecting a person, a vehicle, and an animal (dog) in an outdoor setting. Notification bubbles indicate instant alerts for each detected category, demonstrating the AI smart detection feature.

Bildbeschreibung: A multi-panel image displaying different perimeter protection alerts within the Reolink app interface. It shows visual representations of Line-Crossing Alert, Zone Intrusion Alert, and Zone Loitering Alert, along with detection of forgotten objects and absence of objects.

Bildbeschreibung: A depiction of the Reolink app's AI Video Search feature, where a user types 'Delivery man' to search for relevant footage. Multiple small video thumbnails are shown, illustrating the search results for various events involving people and packages.

Bildbeschreibung: A graphic illustrating the benefits of Wi-Fi 6 for the security camera, emphasizing Superfast Transfer, Low Latency, and Higher Stability. The image shows the camera with prominent Wi-Fi antennas and text explaining the advantages of 5GHz and 2.4GHz bands.

Bildbeschreibung: A visual representation of the camera's flexible recording options. It shows a microSD card slot supporting up to 512GB, an icon for 24/7 recording with a Reolink NVR, and an FTP folder icon, indicating various storage methods.
4. Einrichtungsanweisungen
4.1 Was ist in der Box?
Before starting the installation, ensure all components are present:
- REOLINK RP-WCB8MZ Camera Body
- Montagevorlage
- Befestigungsschrauben und Wandanker
- Netzteil
- Netzwerkkabel (für die Ersteinrichtung oder kabelgebundene Verbindung, falls zutreffend)
- Kurzanleitung
4.2 Ersteinrichtung
- Einschalten: Schließen Sie die Kamera an das Netzteil an und stecken Sie es in eine Steckdose. Die Kamera schaltet sich ein und startet ihren Startvorgang.
- Laden Sie die Reolink-App herunter: Download and install the official Reolink App from your smartphone's app store (iOS or Android).
- Kamera hinzufügen: Open the Reolink App, tap the '+' icon to add a new device. Scan the QR code located on the camera body or packaging. Follow the on-screen instructions to connect the camera to your Wi-Fi network.
- Create Password: Set a strong password for your camera for security purposes.
- Live View: Sobald die Verbindung hergestellt ist, sollten Sie in der Lage sein, view the live feed from your camera within the app.
4.3 Physische Installation
The camera is designed for wall or ceiling mounting. Choose a location that provides the desired viewing angle and has a stable Wi-Fi signal.
- Ort auswählen: Identify a suitable outdoor location, ensuring it is within Wi-Fi range and has access to a power source.
- Montage: Use the provided mounting template to mark screw holes. Drill pilot holes, insert wall anchors if necessary, and secure the mounting bracket with screws.
- Kamera anschließen: Attach the camera body to the mounting bracket and adjust the angle for optimal coverage.
- Kabelmanagement: Route the power cable and any other cables securely to protect them from weather and tampRing.

Bildbeschreibung: A small image showing the REOLINK RP-WCB8MZ camera securely mounted on the exterior brick wall of a building, demonstrating a typical installation scenario.
5. Bedienungsanleitung
5.1 Fernbedienung Viewing
Greifen Sie auf den Live-Feed und die Aufzeichnungen Ihrer Kamera zu.tage from anywhere using the Reolink App or client software on your computer.
- Open the Reolink App and select your camera from the device list.
- Das leben view will display automatically.
- Use the controls on the screen to zoom in/out (digital zoom), access playback, or adjust settings.
5.2 Zwei-Wege-Audio
Führen Sie Echtzeitgespräche über die Kamera.
- Während im Leben view, tap the microphone icon to speak.
- Tippen Sie auf das Lautsprechersymbol, um den Ton vom Kamerastandort abzuspielen.
5.3 Intelligente Erkennung und Benachrichtigungen
Configure the camera to send notifications for specific events.
- Navigate to the camera settings in the Reolink App.
- Go to 'Detection Alarm' or 'Smart Detection' settings.
- Enable detection types (Human, Vehicle, Animal, Package, Non-motorized Object).
- Set up push notifications, email alerts, or siren/spotlight activation upon detection.
- For perimeter protection (line crossing, zone intrusion, zone loitering), configure these options within the Reolink App's detection settings.
5.4 Aufnahmeoptionen
Manage how your camera records footage.
- MicroSD-Karte: Insert a microSD card (up to 512GB) into the designated slot. The camera will automatically begin recording based on your settings (continuous or motion-triggered).
- Reolink NVR: Connect the camera to a compatible Reolink NVR for centralized recording and management.
- FTP: Configure FTP settings in the camera's web interface or app to upload recordings to an FTP server.
- Auf aufgezeichnetes Foo zugreifentage via the 'Playback' function in the Reolink App or client software.
6. Wartung
Regelmäßige Wartung gewährleistet optimale Leistung und Langlebigkeit Ihrer Sicherheitskamera.
- Reinigen Sie die Linse: Reinigen Sie die Kameralinse regelmäßig mit einem weichen, fusselfreien Tuch.amp cloth to remove dust, dirt, or water spots that may affect image quality.
- Verbindungen prüfen: Ensure all cables (power, network) are securely connected and free from damage.
- Firmware-Updates: Regularly check for and install firmware updates via the Reolink App or website to benefit from new features and security enhancements.
- Montage prüfen: Verify that the camera is still securely mounted and has not become loose due to weather or other factors.
- Wetterschutz: While IP67 rated, extreme weather conditions (e.g., heavy snow, ice) may temporarily affect performance. Ensure no obstructions block the camera's view.

Bildbeschreibung: A small image depicting the REOLINK camera mounted outdoors during rainfall, illustrating its IP67 waterproof rating and ability to function in various weather conditions. A temperature bar indicates its operational range from -30°C to 55°C.
7. Fehlerbehebung
This section addresses common issues you might encounter with your REOLINK RP-WCB8MZ camera.
| Ausgabe | Mögliche Ursache | Lösung |
|---|---|---|
| Kamera offline | No power; Wi-Fi signal loss; Network issue | Check power connection; Verify Wi-Fi signal strength; Restart router and camera; Ensure correct Wi-Fi password. |
| Schlechte Bildqualität | Verschmutzte Linse; Unzureichende Beleuchtung; Probleme mit der Netzwerkbandbreite | Clean the lens; Ensure adequate lighting or enable spotlights/IR; Check network speed. |
| Keine Bewegungserkennungswarnungen | Detection settings disabled; Sensitivity too low; Schedule not set correctly | Enable smart detection types; Adjust detection sensitivity; Verify detection schedule in the app. |
| MicroSD-Karte zeichnet nicht auf | Card full; Card faulty; Recording schedule incorrect | Format or replace microSD card; Check recording settings and schedule in the app. |
| Zwei-Wege-Audio funktioniert nicht | Microphone/speaker disabled; Volume too low; Network latency | Enable microphone/speaker in app; Adjust volume; Check network connection. |
8. Spezifikationen
Detailed technical specifications for the REOLINK RP-WCB8MZ camera:
| Besonderheit | Detail |
|---|---|
| Modellname | RP-WCB8MZ |
| Auflösung der Videoaufnahme | 4K (8 MP) |
| Optischer Zoom | 5x |
| Konnektivitätstechnologie | Wi-Fi 6 (Dual-Band 2.4GHz/5GHz) |
| Verwendung im Innen- und Außenbereich | Im Freien |
| Wasserdichtigkeit | IP67 |
| Stromquelle | Kabelgebundene Elektrik |
| Montagetyp | Wand- / Deckenhalterung |
| Speicheroptionen | MicroSD-Karte (bis zu 512 GB), Reolink NVR, FTP |
| Besondere Merkmale | Color Night Vision, AI Smart Detection (Human/Vehicle/Animal/Package), Perimeter Protection, Two-Way Audio |
| Kompatible Geräte | Reolink PoE NVR, Reolink WiFi NVR, Reolink Home Hub Pro, Reolink Home Hub, Google Assistant |
| Technische Daten | 2.99 x 2.91 x 8.66 Zoll |
| Artikelgewicht | 2.09 Pfund |
9. Garantie und Support
For warranty information, technical support, or further assistance, please visit the official REOLINK website or contact REOLINK customer service. Details can typically be found on the product packaging or the REOLINK support portal.
Online resources often include FAQs, video tutorials, and community forums to help you get the most out of your REOLINK product.


