Einführung
This manual provides detailed instructions for the safe and efficient operation of your Xiaomi Portable Electric Air Compressor 2 Pro. Please read this manual thoroughly before using the product and retain it for future reference. This device is designed for inflating tires on cars, motorcycles, bicycles, and balls, offering a convenient and portable solution for maintaining optimal pressure.
Sicherheitshinweise
Warnung: Die Nichtbeachtung dieser Sicherheitshinweise kann zu Stromschlag, Brand oder schweren Verletzungen führen.
- Bewahren Sie das Gerät außerhalb der Reichweite von Kindern auf.
- Der Kompressor darf nicht bei Nässe oder in der Nähe von brennbaren Flüssigkeiten oder Gasen betrieben werden.
- Ensure the air hose is securely connected to the valve before starting inflation.
- Do not over-inflate items. Always refer to the recommended pressure for the item being inflated. The auto shut-off feature helps prevent over-inflation.
- Um eine Überhitzung zu vermeiden, sollte das Gerät nicht über längere Zeit ununterbrochen betrieben werden. Lassen Sie es abkühlen, falls es heiß wird.
- Verwenden Sie zum Laden ausschließlich das mitgelieferte Ladekabel und ein kompatibles 5V/3A-Netzteil.
- Do not disassemble or modify the device. Contact customer support for repairs.
Packungsinhalt
Überprüfen Sie, ob alle Artikel im Paket vorhanden sind:
- Xiaomi Tragbarer elektrischer Luftkompressor 2 Pro
- Fast-connecting air valve
- High-pressure air hose extension
- Needle valve (for balls)
- Presta valve adapter (for some bicycle tires)
- Typ-C-Ladekabel
- Aufbewahrungsbeutel

Figure 1: Included accessories with the air compressor.
Produkt überview
The Xiaomi Portable Electric Air Compressor 2 Pro is a compact and powerful inflation device. It features a digital LED display, multiple preset modes, and a long-lasting rechargeable battery for convenient use.
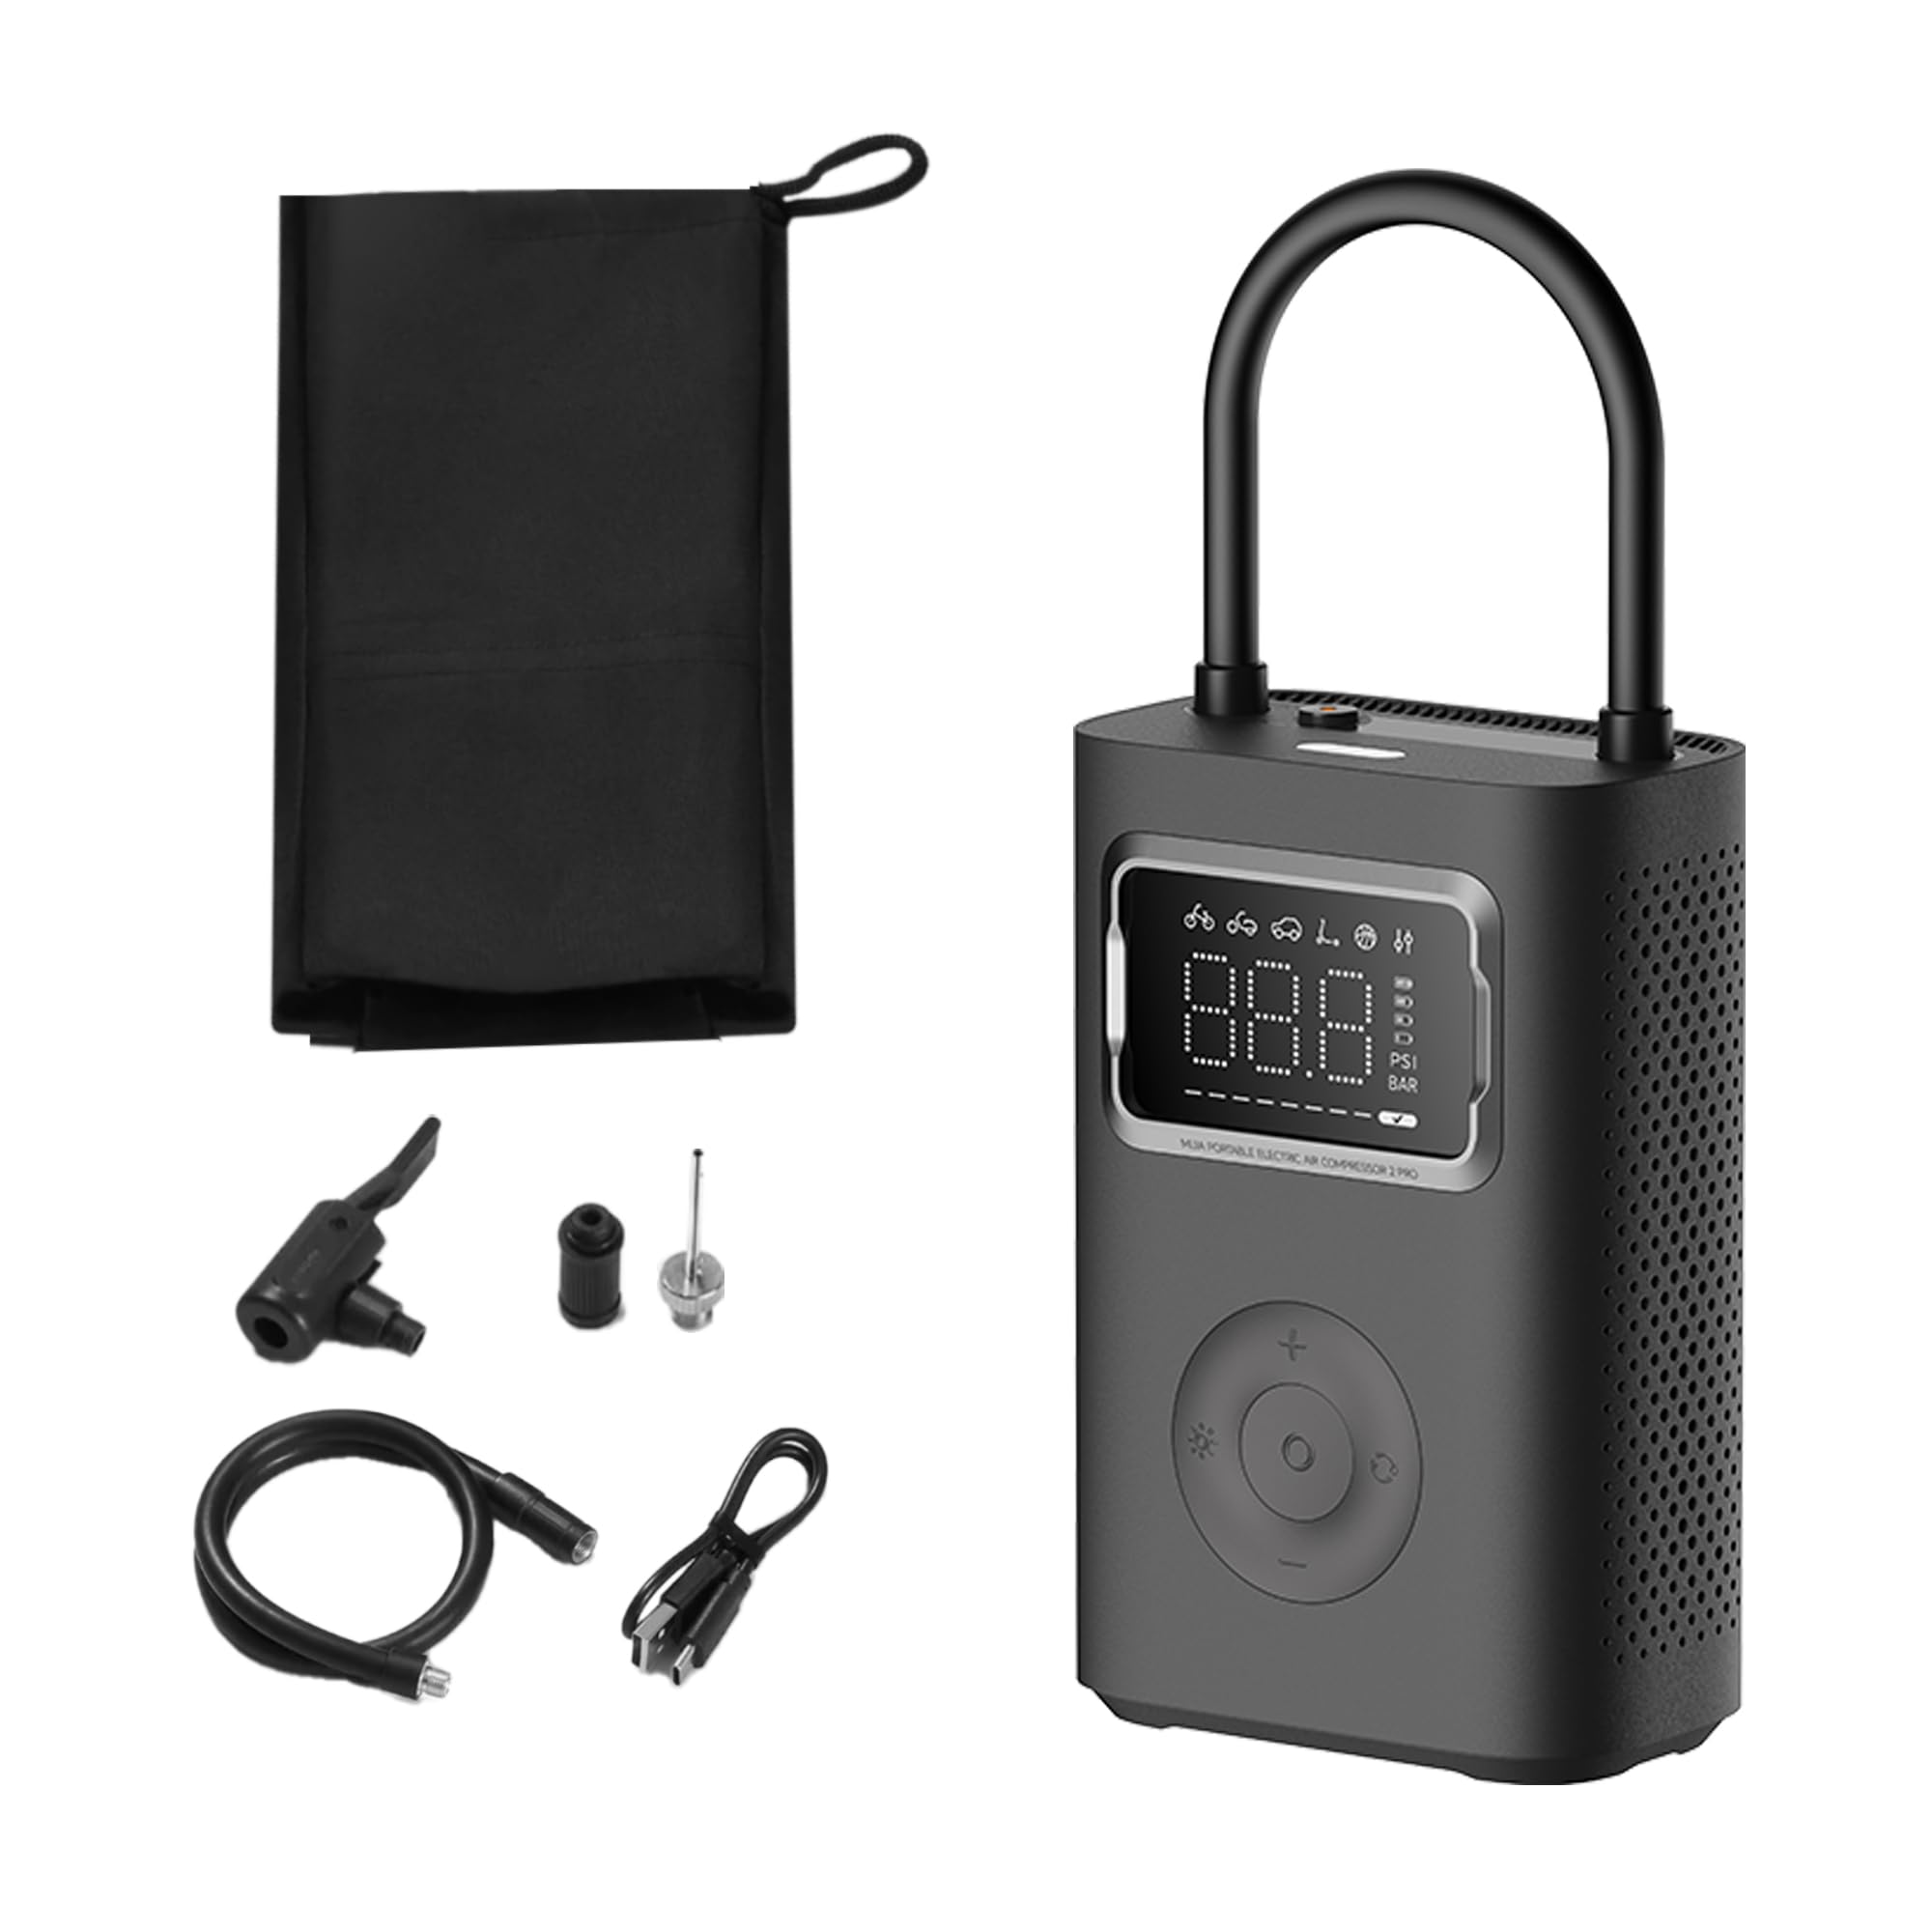
Figure 2: Xiaomi Portable Electric Air Compressor 2 Pro.
Hauptmerkmale:
- Maximaler Druck: Up to 150 PSI for various inflation needs.
- Digitale LED-Anzeige: Provides real-time pressure readings and allows for precise pressure setting.
- Automatische Abschaltung: Die Aufblasvorrichtung stoppt automatisch, sobald der voreingestellte Druck erreicht ist, um ein Überpumpen zu verhindern.
- Kabellos und wiederaufladbar: Powered by a 27 Watt-hour battery, offering portability and convenience.
- Mehrere voreingestellte Modi: Includes modes for car, motorcycle, bicycle, electric scooter, and ball, along with a custom mode.
- Dual-Purpose LED Light: Features a white light for illumination and a red light for signaling.
- Kompakt und leicht: Entwickelt für einfache Lagerung und Transport.

Figure 3: Product details showing 150 PSI capability, battery indicator, and hose lock.
Aufstellen
1. Erstes Aufladen
Before first use, fully charge the air compressor. Connect the provided Type-C charging cable to the charging port on the device and the other end to a 5V/3A USB power adapter (not included). The battery indicator on the display will show charging progress. A full charge typically takes approximately 3.5 hours.
2. Anschließen des Luftschlauchs
The air hose is stored by being locked into the device. To use, pull the air hose out of its storage slot. This action will automatically power on the device. Connect the appropriate valve adapter (Schrader, Presta, or needle valve) to the end of the air hose, depending on the item you intend to inflate.

Figure 4: Pulling the air hose from its slot to power on the device.
Bedienungsanleitung
1. Ein-/Ausschalten
- Einschalten: Pull the air hose out of its storage slot. The device will automatically power on and display the current pressure.
- Ausschalten: Push the air hose back into its storage slot. The device will automatically power off.
2. Das Display verstehen
The large LED display shows the current pressure, selected mode, and battery level. You can switch between PSI and Bar units using the unit selection button.

Figure 5: Digital display showing mode icons and pressure.
3. Selecting Inflation Modes
Press the mode button to cycle through the 6 preset inflation modes:
- Benutzerdefinierter Modus: Default 35 PSI (adjustable 3-150 PSI / 0.2-10.3 Bar)
- Fahrradmodus: Standardwert 45 PSI (einstellbar 30-65 PSI)
- Motorbike Mode: Default 2.4 Bar (adjustable 1.8-3.0 Bar)
- Automodus: Default 2.5 Bar (adjustable 1.8-3.5 Bar)
- Elektroroller-Modus: Standardwert 50 PSI (einstellbar 45-60 PSI)
- Ballmodus: Standardwert 8 PSI (einstellbar 4-16 PSI)

Abbildung 6: Überview of multiple preset inflation modes.
4. Adjusting Pressure Settings
After selecting a mode, use the '+' and '-' buttons to adjust the target pressure. The display will show the target pressure blinking. Once set, the value will stabilize.
5. Inflationsprozess
- Connect the air hose with the appropriate adapter securely to the valve stem of the item to be inflated.
- Das Display zeigt den aktuellen Druck des Artikels an.
- Select the desired inflation mode and set the target pressure.
- Press the start button (usually the center button) to begin inflation.
- The compressor will automatically stop once the target pressure is reached.
- Den Luftschlauch vom Ventilschaft abziehen.

Figure 7: Auto pressure detection and inflation for a bicycle tire.
6. Verwendung des LED-Lichts
Press the light button to activate the LED light. It has two modes: a white light for illumination in dark environments and a red flashing light for emergency signaling.
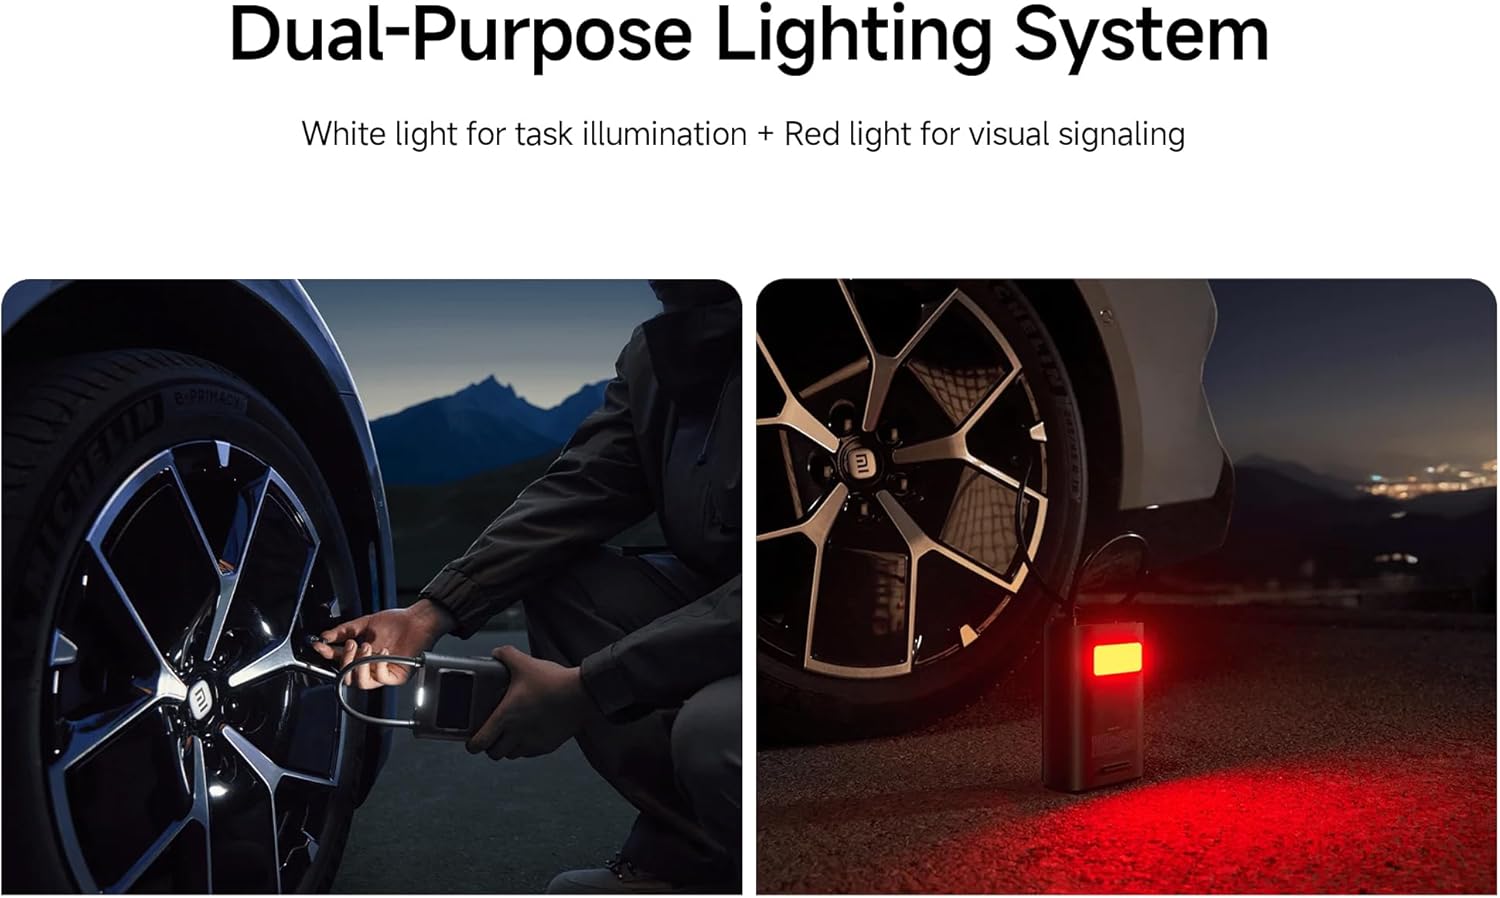
Figure 8: Dual-purpose lighting system in use (white for task, red for signaling).
Laden
The device is equipped with a 27 Watt-hour rechargeable battery. When the battery level is low, the battery indicator on the display will show a low charge. Connect the Type-C charging cable to recharge. The device can reinflate approximately 16 car tires (from 2.0 Bar to 2.5 Bar) on a full charge, or inflate up to 138 size 7 basketballs (from 0 PSI to 8 PSI).

Figure 9: Battery capacity and inflation performance examples.
Wartung
- Reinigung: Wischen Sie die Außenseite des Kompressors mit einem weichen, fusselfreien Tuch ab.amp Tuch. Verwenden Sie keine scharfen Chemikalien oder Scheuermittel.
- Lagerung: Store the device in a cool, dry place, away from direct sunlight and extreme temperatures. Ensure the air hose is properly stowed to prevent damage.
- Batteriepflege: Für eine optimale Akkulaufzeit sollte das Gerät mindestens einmal alle drei Monate aufgeladen werden, wenn es nicht regelmäßig benutzt wird.
Fehlerbehebung
| Problem | Mögliche Ursache | Lösung |
|---|---|---|
| Gerät lässt sich nicht einschalten. | Battery is depleted; Air hose not fully pulled out. | Charge the device; Ensure the air hose is fully extended from its slot. |
| Die Inflation verläuft langsam oder ist wirkungslos. | Low battery; Air hose not securely connected; Incorrect pressure setting. | Recharge the device; Check all connections for leaks; Verify the target pressure. |
| Das Gerät stoppt unerwartet. | Target pressure reached (auto shut-off); Overheating; Low battery. | This is normal if target pressure is met; Allow device to cool down; Recharge the device. |
| Ungenaue Druckanzeige. | Lose Verbindung; Sensorfehler. | Ensure the air hose is tightly connected to the valve; If problem persists, contact support. |
Technische Daten
| Besonderheit | Detail |
|---|---|
| Modellnummer | XM-MJCQB06QW-03 |
| Maße | 10.5 x 8 x 25.5 cm |
| Gewicht | 1.1 kg |
| Material | Plastik |
| Stromquelle | Batteriebetrieben |
| Bandtage | 10.8 Volt |
| Wastage | 27 Wattstunden |
| Amperage Kapazität | 3 Amps |
| Maximaler Druck | 150 PSI |
| Schlauchlänge | 200 mm |
| Besondere Merkmale | Automatic Shut-Off, Digital Display, LED Light, Lightweight |
| Empfohlene Verwendung | Tire Inflation (Car, Bike, Motorcycle, Electric Scooter), Ball Inflation, Toy Inflation |
Offizielle Produktvideos
Video 1: General product overview and demonstration of key features.
Video 2: Demonstration of the compressor's portability and ease of use.
Video 3: Detailed look at the inflation process and digital display functionality.
Garantie und Support
For warranty information or technical support, please refer to the warranty card included with your product or contact the manufacturer directly through their official website. Ensure you have your product model number (XM-MJCQB06QW-03) and purchase details available when seeking support.