Wichtige Sicherheitsinformationen
Please read this manual carefully before installation and use. Keep this manual for future reference.
- Gewichtskapazität: Die maximale Tragfähigkeit von 15 kg (33 lbs) darf nicht überschritten werden. Eine Überschreitung dieser Grenze kann zu schweren Verletzungen oder Sachschäden führen.
- Monitorgröße: The monitor arm supports monitors up to 42 inches. The VESA extender supports monitors from 17 to 35 inches. Ensure your monitor's size and weight are within these limits.
- VESA-Kompatibilität: The arm supports VESA patterns 75x75mm and 100x100mm. The extender converts these to 200x100mm and 200x200mm. Verify your monitor's VESA pattern before installation.
- Schreibtischstärke: Die C-clamp requires a desk thickness between 0.39 inches (10mm) and 2.76 inches (70mm). Ensure your desk can support the combined weight of the arm, monitor, and extender.
- Montage: Montieren Sie das Produkt gemäß der Anleitung. Eine unsachgemäße Montage kann zu Schäden oder schweren Verletzungen führen.
- Bewegliche Teile: This product contains moving parts. Exercise caution during adjustment to avoid pinching or crushing injuries.
- Wartung: Periodically check all screws and connections to ensure they are secure. Retighten as necessary.
Packungsinhalt
Verify that all components are present and undamaged before proceeding with installation. If any parts are missing or damaged, please contact MOUNTUP customer support.
- Monitorarm-Baugruppe
- C-Clamp Base
- VESA Extender Bracket (2 pieces)
- VESA Extender Plate
- Hardware-Set (Schrauben, Unterlegscheiben, Distanzstücke, Inbusschlüssel)

Bild: Überview of the MOUNTUP Heavy Duty Single Monitor Arm, including the main arm, C-clamp, and the VESA extender components.
Technische Daten
| Marke | MONTAGE |
| Modell | Heavy Duty Single Monitor Arm with VESA Extender |
| Monitor Arm Compatibility | Monitors up to 42 inches |
| VESA Extender Compatibility | Monitors 17-35 inches |
| Gewichtskapazität | 4.4 - 33 lbs (2 - 15 kg) |
| VESA Patterns (Arm) | 75x75mm, 100x100mm |
| VESA Patterns (Extender) | Converts to 200x100mm, 200x200mm, 150x150mm, 100x200mm |
| Tischplattenstärke (C-Clamp) | 0.39 - 2.76 Zoll (10 - 70 mm) |
| Höhenbereich | 9.3 - 22.1 Zoll |
| Maximale Ausdehnung | 23.8 Zoll |

Image: Illustration highlighting the monitor arm's robust load capacity of up to 33 lbs.

Image: Diagram showing the monitor arm's height adjustment range from 9.3 to 22.1 inches and a maximum extension of 23.8 inches.
Setup und Installation
Step 1: Install the C-Clamp Base
- Platzieren Sie die C-clamp Platziere es am Rand deines Schreibtisches.
- Ensure the desk thickness is between 0.39 and 2.76 inches.
- Ziehen Sie die C-Klamp screw until the base is securely fastened to the desk. Do not overtighten.

Image: The monitor arm's C-clamp securely attached to a desk, demonstrating its stable mounting.
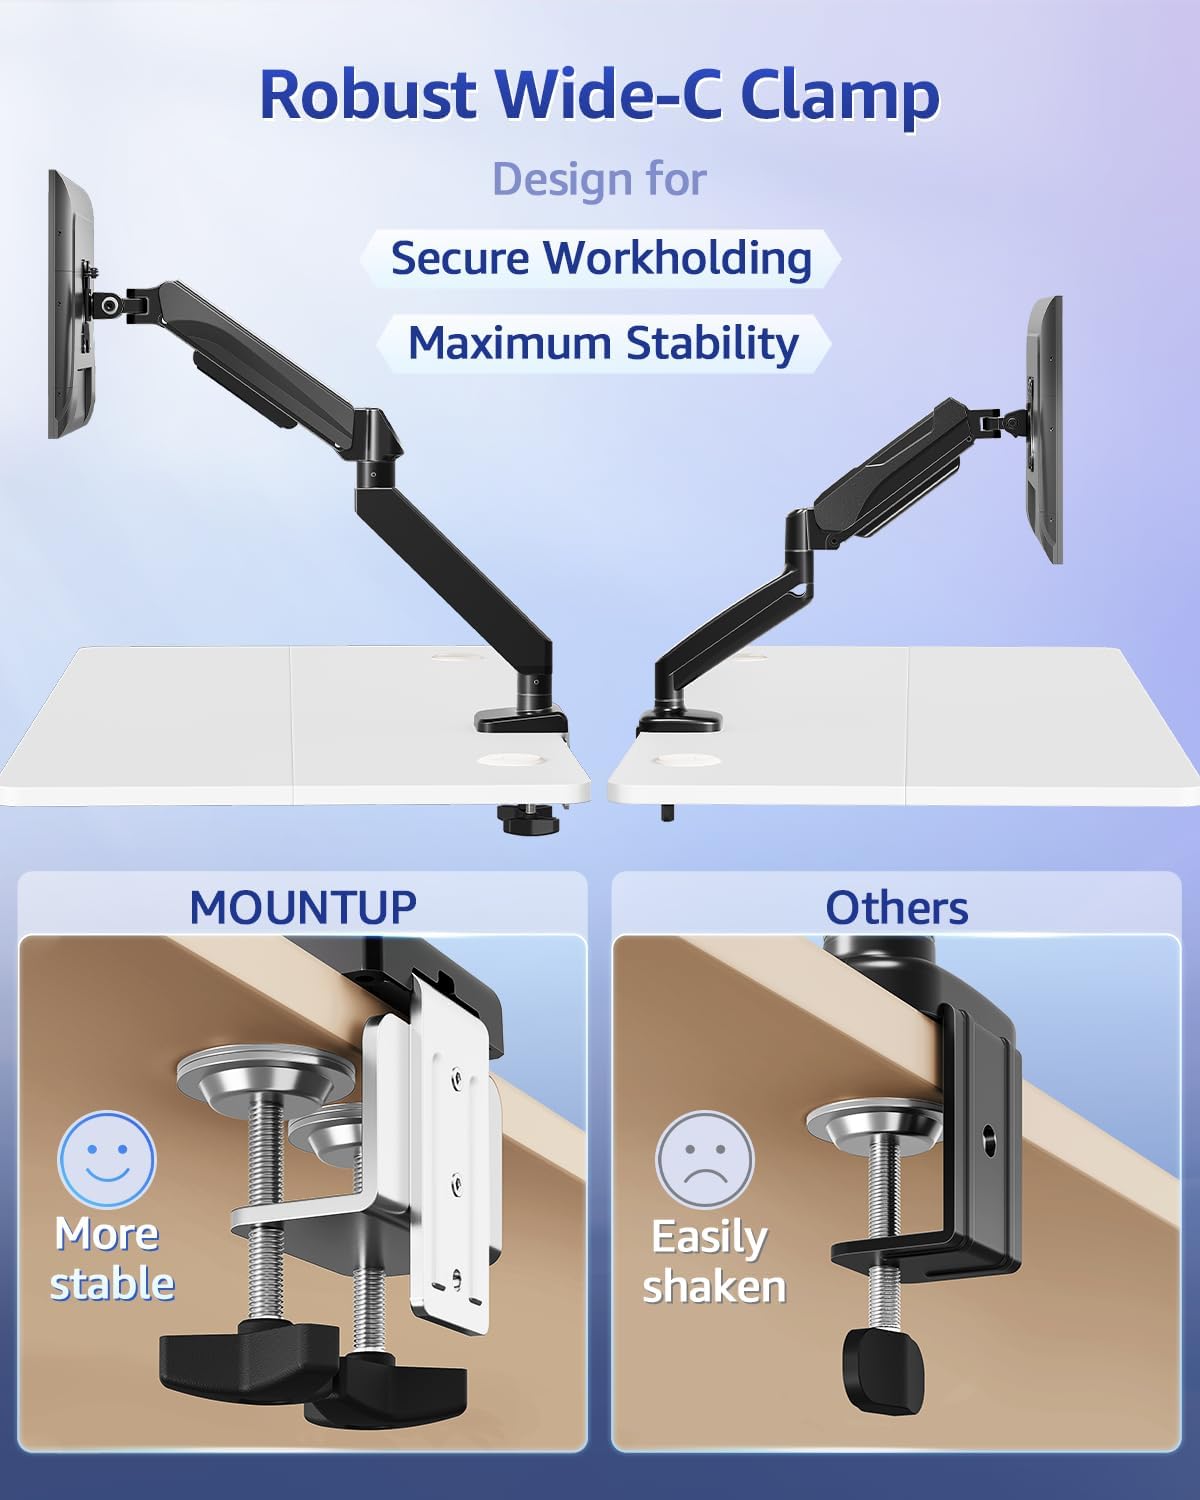
Image: A visual comparison highlighting the wider and more stable design of the MOUNTUP C-clamp compared to a standard clamp.
Step 2: Assemble the VESA Extender (if needed)
If your monitor has a VESA pattern larger than 100x100mm (e.g., 200x100mm or 200x200mm), use the VESA extender bracket.
- Attach the two extender brackets to the VESA extender plate using the provided screws. Ensure the ridge on the extender plate aligns with the brackets for a secure fit.
- Securely fasten the extender assembly to your monitor's VESA mounting holes using the appropriate screws from the hardware kit.

Image: Step-by-step visual guide for assembling the VESA extender brackets onto the main plate using screws.

Bild: Eine detaillierte view of the VESA extender plate, showing its design for adapting to various VESA patterns.

Image: A diagram illustrating the various VESA patterns (200x100mm, 150x150mm, 200x200mm, 100x200mm) supported by the extender.

Image: A visual comparison showing a monitor that previously could not be mounted (before) and how the VESA extender enables mounting for larger VESA patterns (after).
Step 3: Attach Monitor to Arm
- Slide the monitor (with or without the VESA extender attached) onto the VESA head of the monitor arm.
- Secure the monitor to the VESA head using the provided screws. Ensure all screws are tightened to prevent the monitor from detaching.
Bedienungsanleitung
Anpassen der Monitorposition
The MOUNTUP monitor arm allows for flexible adjustment of your monitor's position to achieve optimal ergonomics.
- Höhenverstellung: Gently push or pull the monitor up or down to the desired height. The gas spring mechanism will hold it in place.
- Neigungseinstellung: Tilt the monitor screen up or down to reduce glare and find a comfortable viewing-Winkel.
- Schwenkeinstellung: Rotate the monitor horizontally (left or right) to share your screen or change viewing-Richtung.
- Rotationseinstellung: Drehen Sie den Monitor um 360 Grad, um zwischen Quer- und Hochformat zu wechseln.
Spannungseinstellung
If the monitor arm is too stiff or too loose, you may need to adjust the gas spring tension.
- Locate the tension adjustment screw on the arm (usually near the pivot points).
- Use the provided Allen wrench to turn the screw:
- Drehen im Uhrzeigersinn (-) Zu reduzieren tension (for lighter monitors or if the arm is too stiff).
- Drehen gegen den Uhrzeigersinn (+) Zu Zunahme Spannung (bei schwereren Monitoren oder wenn der Arm durchhängt).
- Adjust gradually and test the arm's movement after each adjustment until it holds your monitor securely at any position.
Wartung
- Reinigung: Wipe the monitor arm and VESA extender with a soft, damp Mit einem Tuch abwischen. Vermeiden Sie die Verwendung von scheuernden Reinigern oder Lösungsmitteln, die die Oberfläche beschädigen könnten.
- Regelmäßige Kontrollen: Regularly inspect all screws and connections (C-clamp, VESA plate, arm joints) to ensure they remain tight. Retighten any loose fasteners to maintain stability and safety.
- Schmierung: The gas spring mechanism is maintenance-free and does not require lubrication.
Fehlerbehebung
Monitor Sags or Does Not Hold Position
- Lösung: The gas spring tension is likely too low for your monitor's weight. Increase the tension by turning the adjustment screw counter-clockwise (+) with the provided Allen wrench until the arm can hold the monitor in place.
- Gewicht prüfen: Ensure your monitor's weight is within the 4.4 - 33 lbs capacity.
Arm is Too Stiff to Move
- Lösung: The gas spring tension is likely too high. Decrease the tension by turning the adjustment screw clockwise (-) with the provided Allen wrench.
Monitor Wobbles
- Lösung: Check if the C-clamp is securely tightened to the desk. Ensure all VESA mounting screws are tight. Verify that the monitor arm joints are properly secured.
- Stabilität des Schreibtisches: Stellen Sie sicher, dass Ihr Schreibtisch selbst stabil ist und nicht wackelt.
Garantie und Support
MOUNTUP products are designed for durability and performance. For specific warranty information, please refer to the documentation included with your purchase or visit the official MOUNTUP webWebsite.
If you encounter any issues or have questions regarding the installation or operation of your MOUNTUP Heavy Duty Single Monitor Arm and VESA Extender, please contact MOUNTUP customer support for assistance.
Kontaktinformationen: Please refer to your product packaging or the MOUNTUP official webHier finden Sie die aktuellsten Kontaktdaten des Kundensupports.


