1. Einleitung
This user manual provides essential information for the installation, configuration, and operation of your Jennov 4K 8MP Outdoor PTZ IP POE Camera, Model PS6006. This advanced security camera offers high-resolution surveillance with pan, tilt, and optical zoom capabilities, along with intelligent detection features. Please read this manual thoroughly before using the product to ensure proper functionality and safety.
2. Produktüberschreitungview
Hauptmerkmale
- Ultra 4K HD Resolution: 8MP (3840*2160 pixels) for clear, detailed images.
- 20X Optical Zoom & 10X Digital Zoom: Motorized lens (4.7~94mm) for detailed remote viewing without quality loss.
- Schwenk- und Neigefunktion: Wide coverage with pan and tilt control.
- Auto Tracking & Human Detection: Automatically tracks detected individuals and reduces false alarms.
- 320 Fuß Infrarot-Nachtsichtgerät: Enhanced night vision with 6 high-performance infrared LED lights for clear black-and-white images in darkness.
- Power Over Ethernet (POE): Single Ethernet cable for power and data connection.
- Zweiwege-Audio: Eingebautes Mikrofon und Lautsprecher für Echtzeitkommunikation.
- IP66 Wetterfest: Robustes Design für den Außeneinsatz unter verschiedenen Witterungsbedingungen.
- Efficient H.265 Coding: Saves bandwidth and storage space.
Packungsinhalt
Überprüfen Sie, ob alle Artikel in Ihrem Paket vorhanden sind:
- Jennov 4K 8MP Outdoor PTZ IP POE Camera (Model PS6006)
- Ethernet-Kabel
- Netzteil
- Montageständer
- Bedienungsanleitung
- Wasserdichte Kappe
- Warnaufkleber
- Befestigungsschrauben

Bild: Detailliert view of the Jennov 4K POE Camera components and the items included in the packing list, such as the camera, Ethernet cable, power adapter, stand, user manual, waterproof cap, and screws.
3. Einrichtungsanweisungen
3.1 Montage der Kamera
- Wählen Sie einen geeigneten Standort im Freien für die Montage, der ein freies Sichtfeld gewährleistet. view and access to an Ethernet cable.
- Use the provided mounting stand and screws to securely attach the camera to a wall or ceiling.
- Ensure the camera is positioned to cover the desired surveillance area.
3.2 Power and Network Connection (POE)
The Jennov PS6006 camera supports Power Over Ethernet (POE), simplifying installation by using a single Ethernet cable for both power and data transmission. This camera is only compatible with POE NVRs that support the Onvif protocol.
- Connect one end of the Ethernet cable to the camera's Ethernet port.
- Connect the other end of the Ethernet cable to a POE NVR or a POE switch.
- If using a POE switch, connect the POE switch to your router.
- Stellen Sie sicher, dass alle Verbindungen sicher sind.
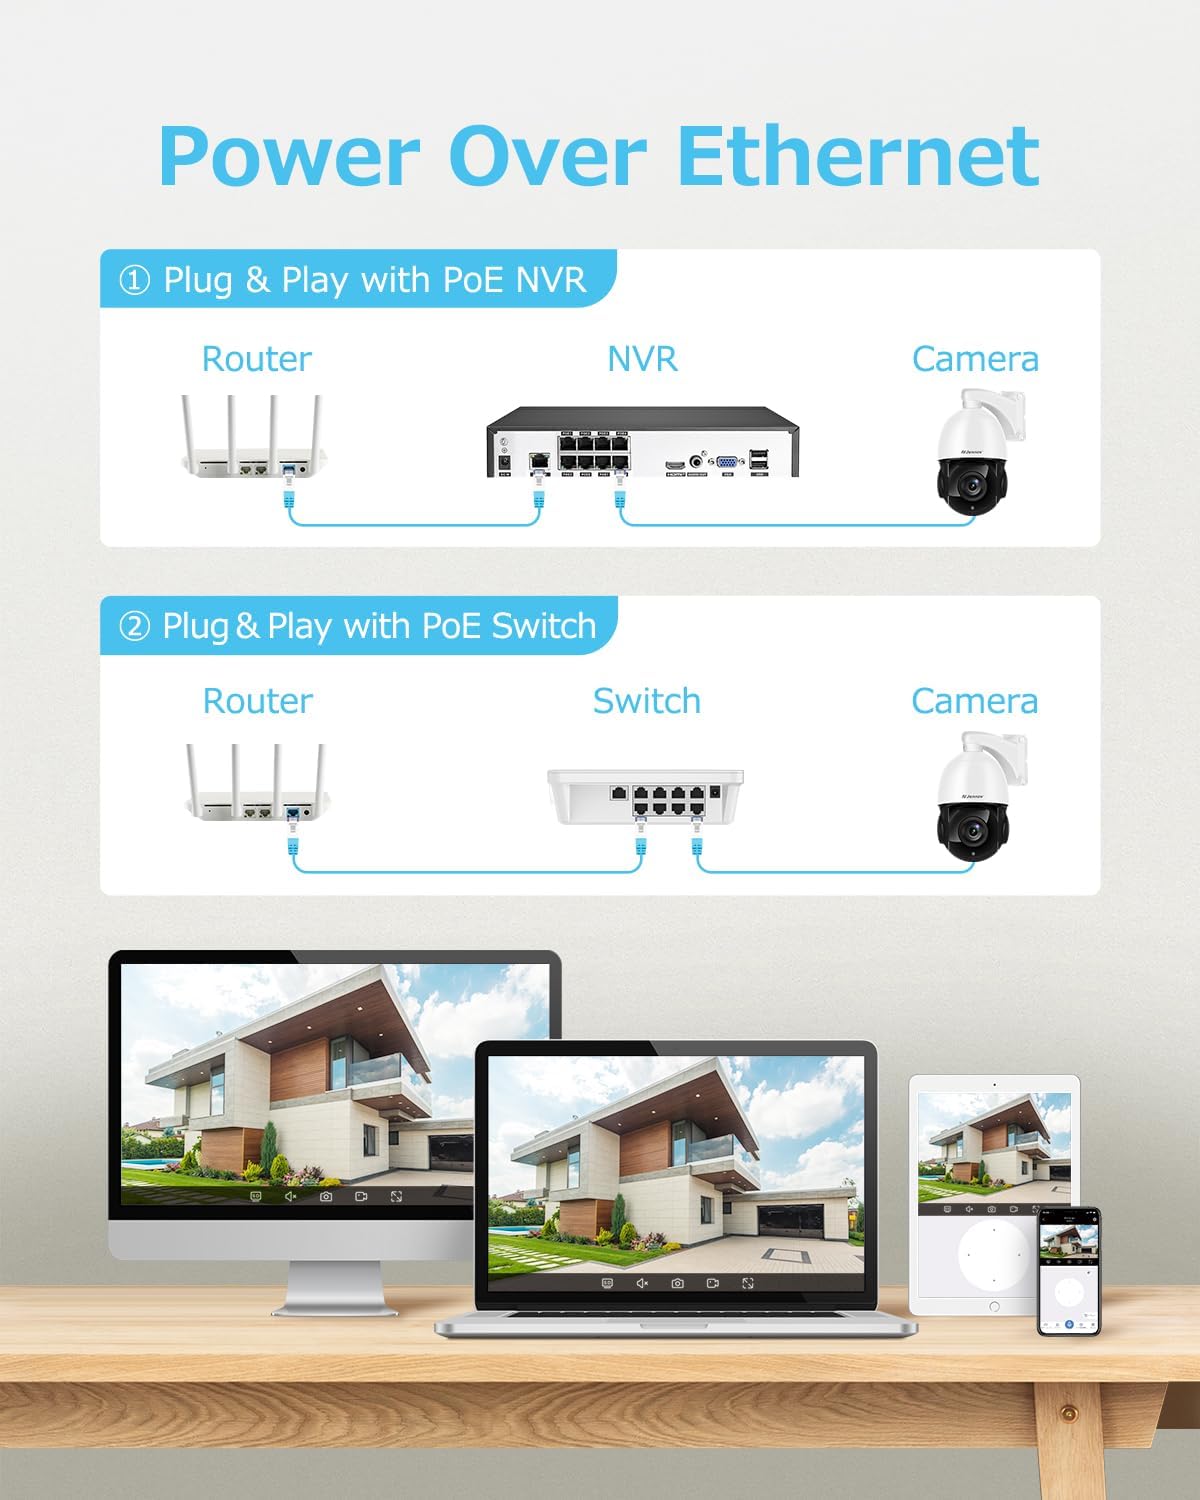
Image: Diagram illustrating two methods of Power Over Ethernet connection: directly to a POE NVR, or via a POE switch connected to a router, both providing power and data to the camera.
3.3 Erstkonfiguration
- Power up the camera by connecting it to a POE NVR or POE switch.
- Perform the initial setup through your POE NVR's user interface or by scanning the QR code via the VideoLink App on your mobile device.
- Follow the on-screen prompts to configure network settings, create user accounts, and set up recording preferences.
4. Bedienungsanleitung
4.1 Schwenk-, Neige- und Zoomsteuerung
Control the camera's pan (horizontal rotation), tilt (vertical movement), and optical zoom remotely via the VideoLink app or your NVR interface.
- Pfanne: Rotate the camera horizontally to cover a wide area.
- Neigung: Adjust the camera's vertical angle to view höhere oder niedrigere Bereiche.
- Optischer Zoom: Use the zoom function to magnify distant objects without compromising image clarity. The camera supports 20X optical zoom.
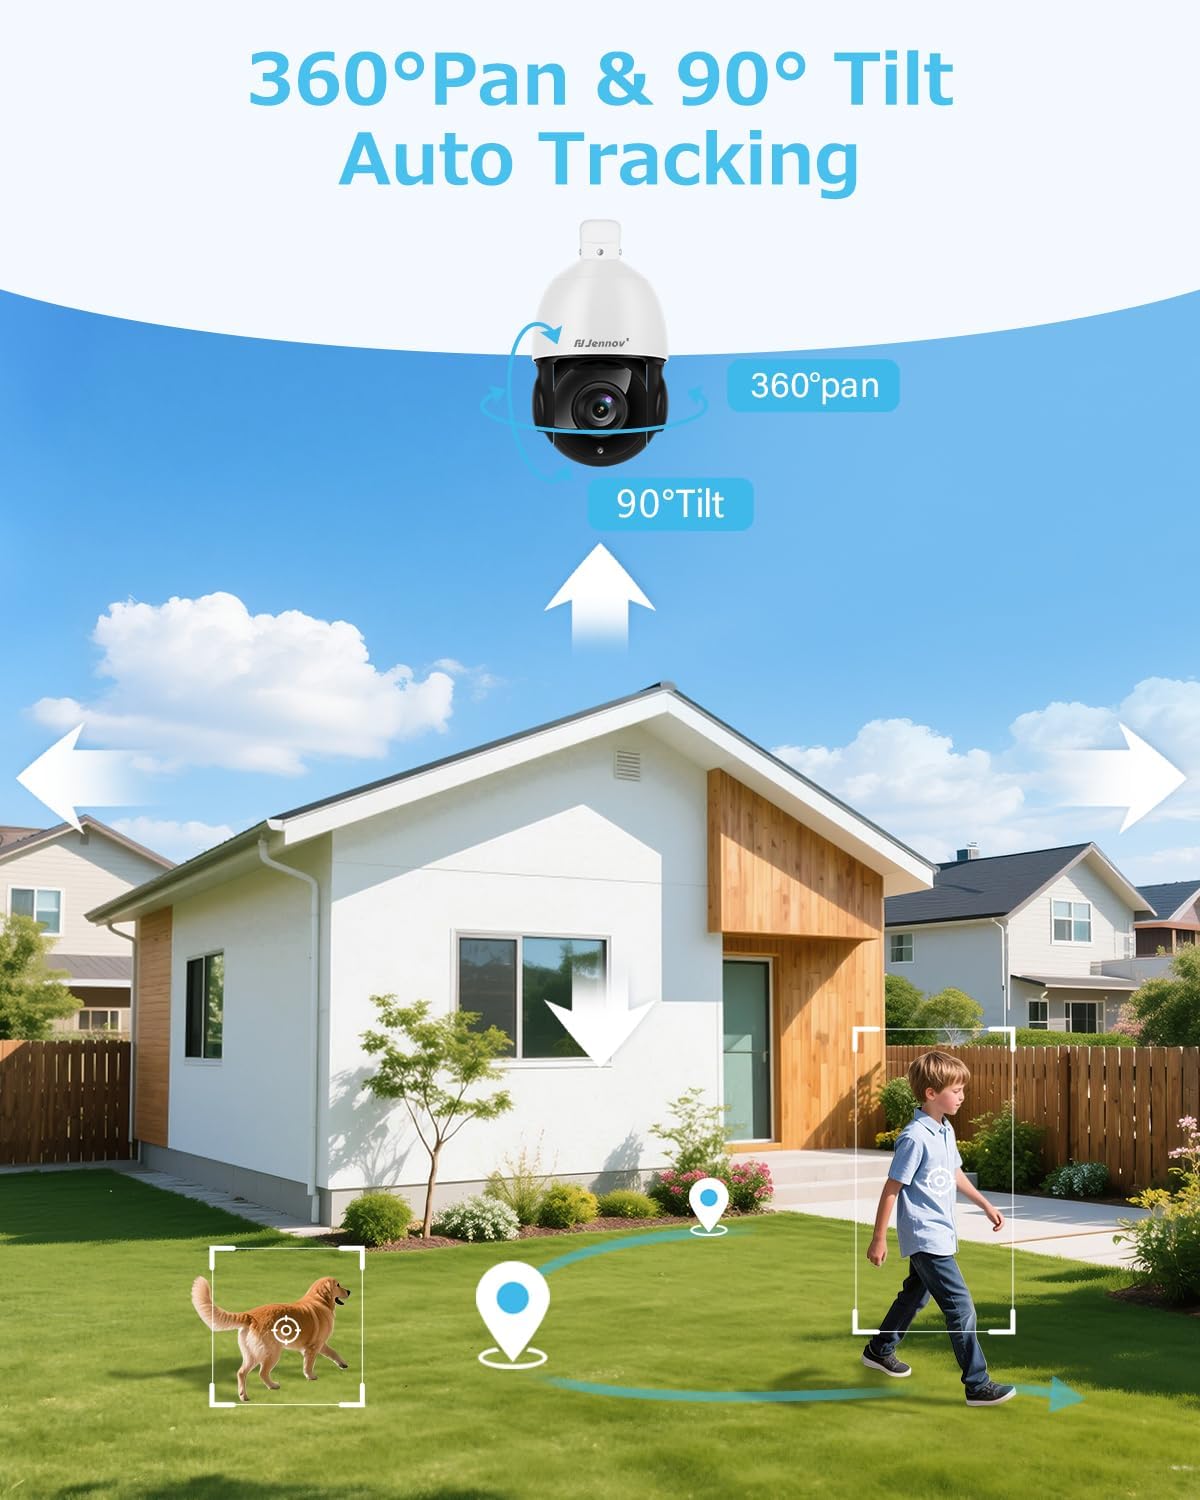
Image: An outdoor security camera mounted on a house, illustrating its 360-degree pan and 90-degree tilt capabilities, along with auto-tracking of a person and a dog in the yard.

Bild: Eine Landschaft view demonstrating the camera's 20X optical zoom, showing how a distant object (like a wind turbine) becomes progressively clearer from 1X to 20X zoom.
4.2 Auto Tracking and Human Detection
The camera features intelligent auto-tracking and human detection to enhance security monitoring.
- Menschliche Erkennung: Configure detection zones and sensitivity settings in the app to minimize false alarms caused by non-human movement.
- Automatische Verfolgung: When a person is detected, the camera will automatically track their movement within its field of view. Note: The camera tracks one target at a time.
- Cruising Routes: Set up to 8 cruising routes, each with up to 16 preset positions, for cyclical patrol of specific areas.
- Benachrichtigungen: Receive real-time video or snapshot alerts on your mobile phone when human movement is detected.
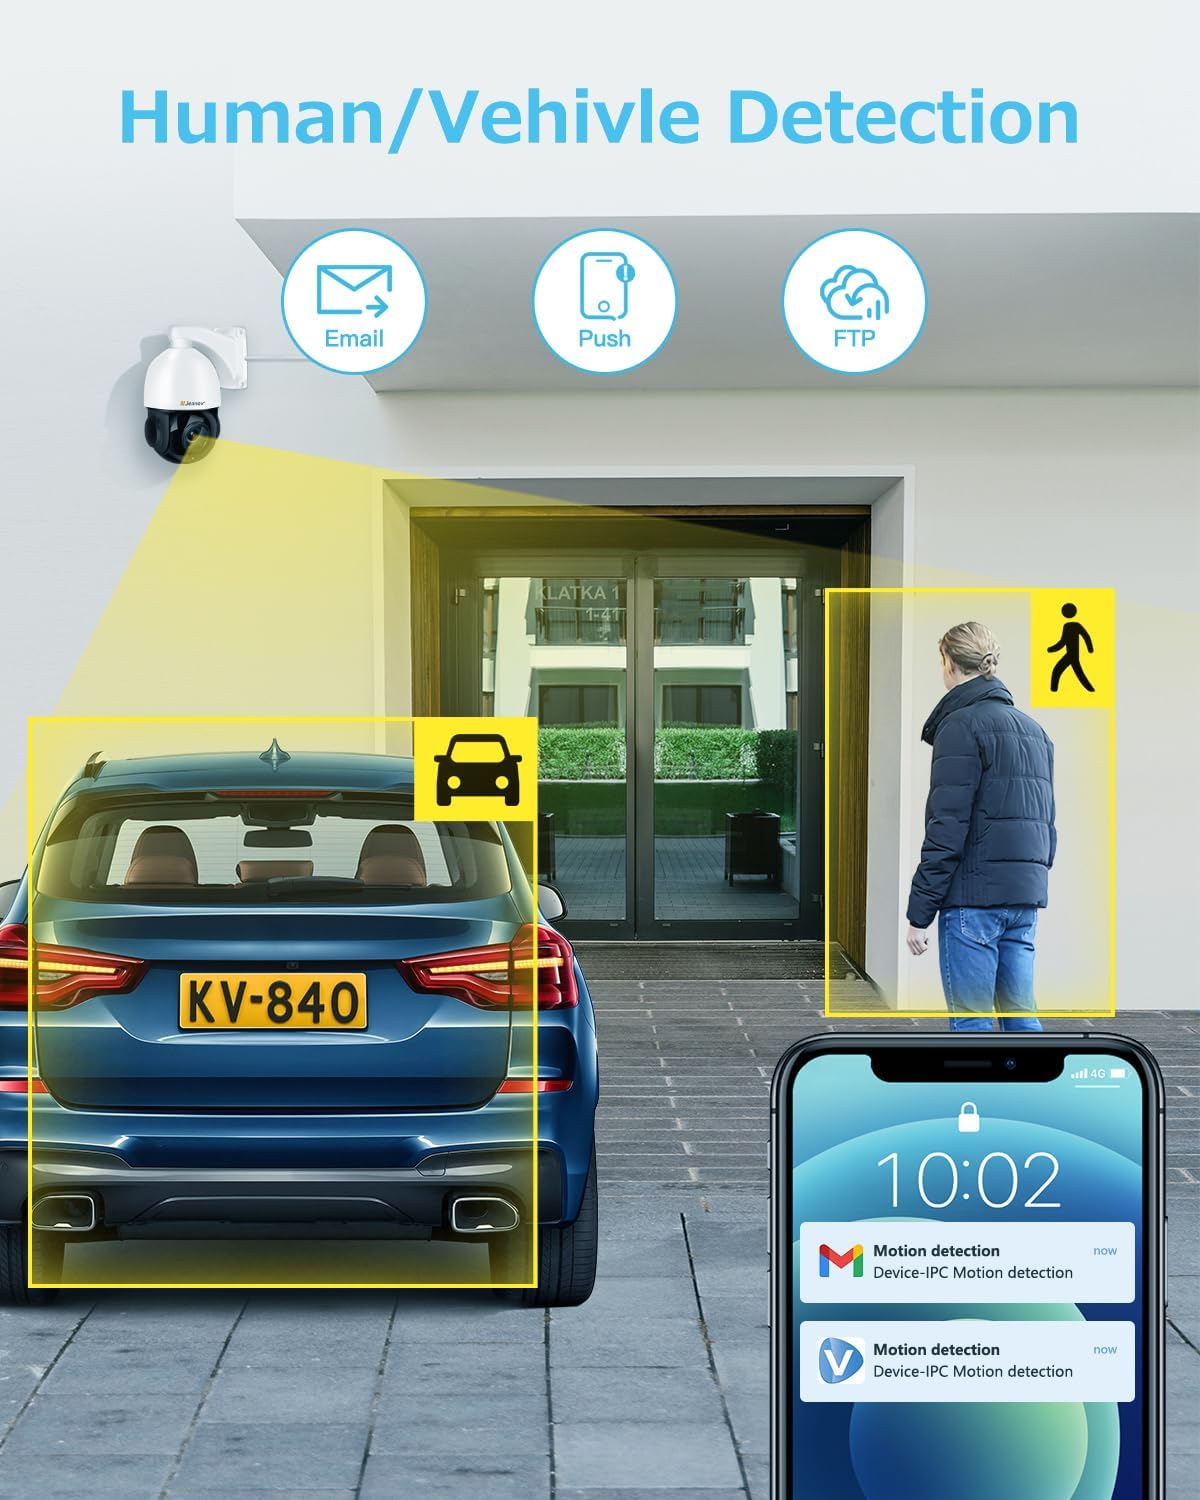
Image: An illustration showing the camera detecting both a human and a vehicle, with corresponding motion detection alerts displayed on a smartphone screen.
4.3 Nachtsicht
The camera is equipped with advanced IR night vision for clear surveillance in low-light or no-light conditions.
- IR-Cut: The camera automatically switches between day and night modes using its IR-cut filter.
- Infrarot-LEDs: Six high-performance infrared LED lights provide a night vision range of up to 320 feet (approximately 97 meters).
- Schwarzweißmodus: In dark conditions, the camera provides clear black-and-white images for accurate motion detection and monitoring.

Image: A split image demonstrating the camera's day and night vision capabilities, showing a clear color view during the day and a detailed black-and-white infrared view at night, both covering a residential area.
4.4 Zwei-Wege-Audio
Kommunizieren Sie mit Besuchern oder schrecken Sie Eindringlinge mit dem eingebauten Mikrofon und Lautsprecher der Kamera ab.
- Access the two-way audio function through the VideoLink app.
- Speak into your mobile device's microphone to transmit audio through the camera's speaker.
- Listen to audio from the camera's location through your mobile device.
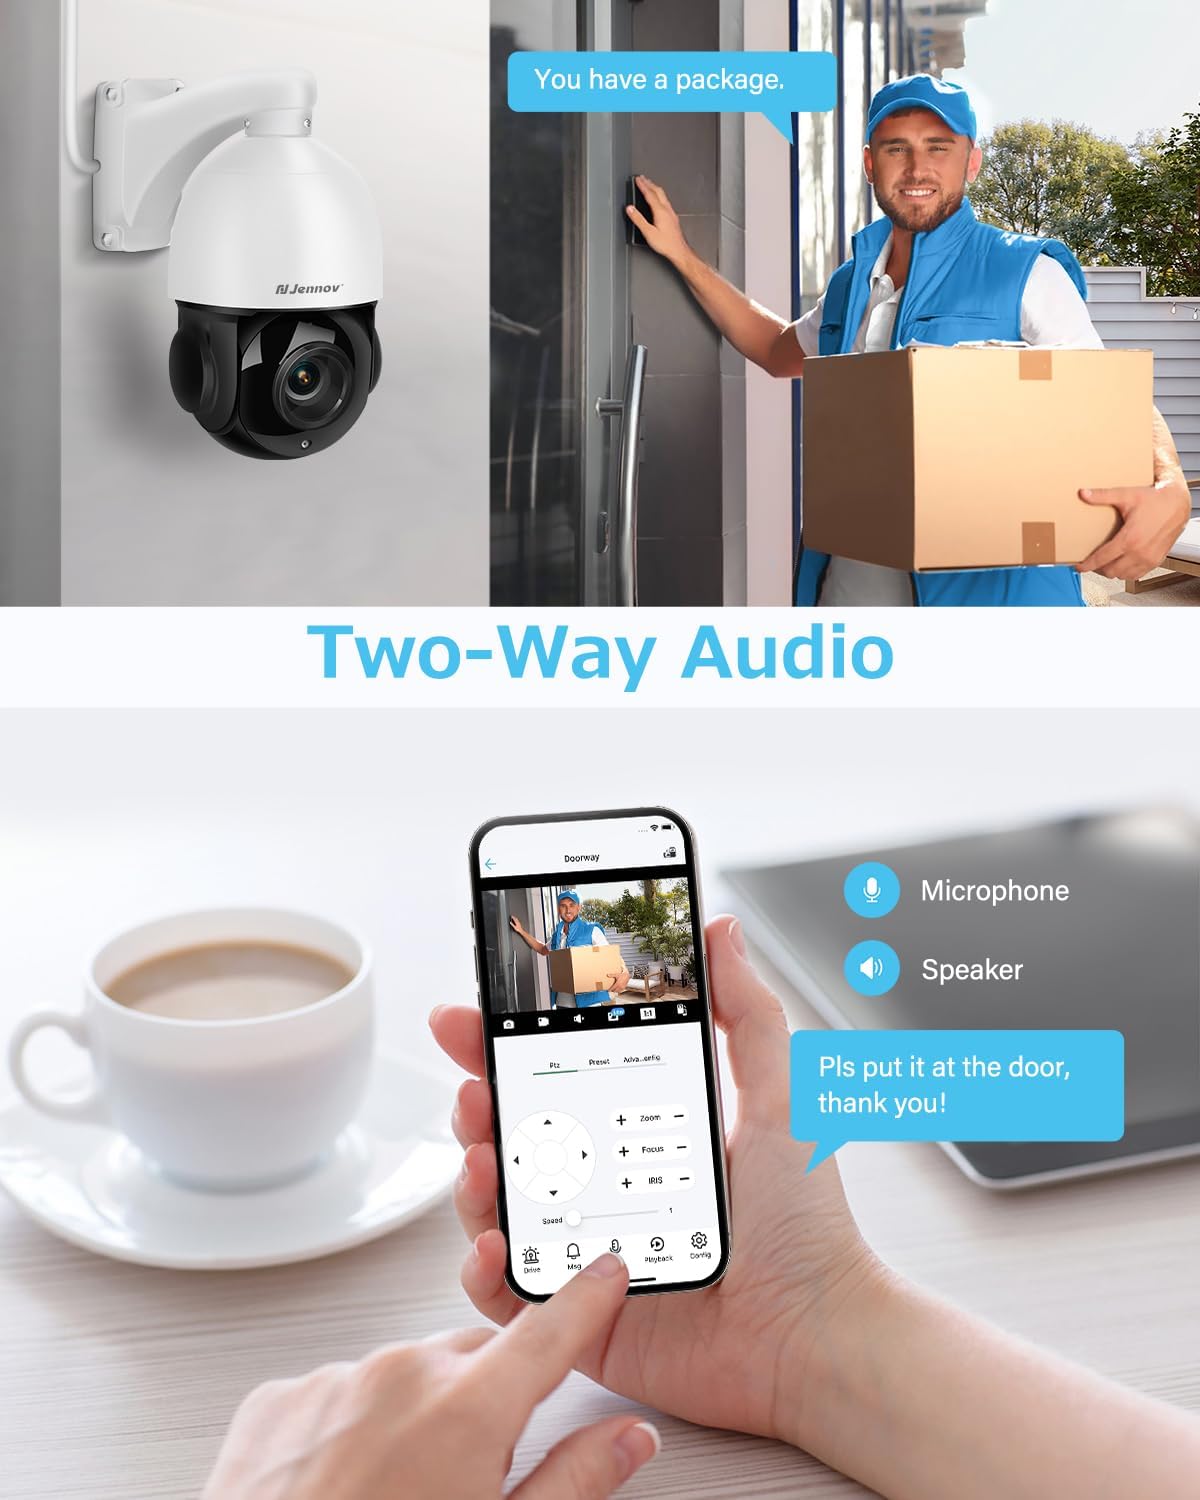
Image: A scene depicting a delivery person at a door, with a smartphone displaying the camera feed and controls for microphone and speaker, illustrating the two-way audio feature.
4.5 Fernzugriff und Speicherung
Access your camera feed and recordings from anywhere using the dedicated app.
- Mobile App: Download the VideoLink app to your smartphone (Android/iOS) for live viewing, playback, snapshots, and motion alerts.
- Desktop-Client: A client is available for Windows operating systems. Mac users can access the camera via a web Browser.
- Lagerung: The camera supports local storage via a Micro SD card (up to 256GB, not included) and continuous recording to a compatible Jennov NVR or FTP server.
5. Wartung
- Reinigung: Regularly clean the camera lens with a soft, dry cloth to ensure optimal image clarity. Avoid abrasive cleaners.
- Firmware-Updates: Überprüfen Sie die Angaben des Herstellers webBesuchen Sie die Website oder App, um verfügbare Firmware-Updates zu erhalten und sicherzustellen, dass Ihre Kamera über die neuesten Funktionen und Sicherheitsverbesserungen verfügt.
- Kabelinspektion: Periodically inspect the Ethernet cable and connections for any signs of wear or damage, especially in outdoor environments.
- Wetterschutz: While the camera is IP66 weatherproof, ensure proper installation to prevent water accumulation around connections.
6. Fehlerbehebung
Häufige Probleme und Lösungen
- No Image/Connection:
- Ensure the Ethernet cable is securely connected to both the camera and the POE NVR/switch.
- Verify that the POE NVR/switch is powered on and functioning correctly.
- Check network settings and IP address configuration.
- Schlechte Bildqualität:
- Reinigen Sie das Kameraobjektiv.
- Ensure sufficient lighting for optimal performance, especially at night.
- Check your network environment; 4K cameras require stable network conditions.
- Falscher Alarm:
- Adjust the detection area and sensitivity settings in the app to reduce triggers from environmental factors (e.g., moving branches, small animals).
- Camera Not Tracking:
- Ensure auto-tracking is enabled in the camera settings.
- Verify that human detection is functioning correctly.
- NVR-Kompatibilität:
- This camera is only compatible with POE NVRs that support the Onvif protocol. It cannot work with WiFi NVRs.
So setzen Sie die Kamera zurück
If you encounter persistent issues, a factory reset may be necessary.
- Physischer Reset-Knopf: Open the cover on the back of the camera to locate the reset button, typically next to the SD card slot. Press and hold for several seconds until the camera resets.
- Software Reset (VideoLink App): Navigate to "Config" > "Factory Reset".
- Software Reset (LMS): Right-click the IP address of the camera and select "Restore".
- Software Reset (AjDevTools): Use the tool to search for the camera's IP address, tick the camera, and click "Batch Reset".
7. Spezifikationen
| Besonderheit | Spezifikation |
|---|---|
| Modellname | PS6006 |
| Auflösung der Videoaufnahme | 4K (3840x2160) |
| Effektive Standbildauflösung | 8 Megapixel |
| Optischer Zoom | 20X |
| Digital Zoom | 10X |
| Nachtsichtbereich | 320 Fuß |
| Bildfrequenz | 20 Bilder pro Sekunde |
| Konnektivitätstechnologie | Ethernet (POE) |
| Drahtlose Kommunikationstechnologie | Power Over Ethernet |
| Verwendung im Innen- und Außenbereich | Im Freien |
| Wasserbeständigkeit | IP66 Wasserdicht |
| Material | Aluminium, Kunststoff |
| Artikelabmessungen (L x B x H) | 4.7 x 11.7 x 8.3 Zoll |
| Artikelgewicht | 4.58 Pfund |
| Kompatible Geräte | Smartphone, POE NVR (Onvif protocol) |
| Kontrollmethode | App |
| Videokodierung | H.265 |
| Flash-Speichertyp | Micro-SD (bis zu 256 GB) |
8. Garantie und Support
Jennov is committed to providing reliable products and excellent customer service.
- 30 Tage kostenlose Rückgabe: Genießen Sie sorgenfreies Einkaufen dank unserer 30-tägigen Rückgabegarantie.
- 24/7 Online-Support: Access assistance anytime through online channels.
- Lebenslanger technischer Support: Benefit from ongoing technical support for the lifespan of your product.
- Uncomplicated Guarantee: Jennov stands behind its products with a straightforward guarantee.
Weitere Hilfe finden Sie auf der offiziellen Website. Jennov Store oder wenden Sie sich an den Kundensupport.

Image: Icons representing Jennov's customer support offerings: 30-day free returns, 24/7 online support, lifetime tech support, and an uncomplicated guarantee.


