Einführung
This manual provides essential instructions for the proper setup, operation, and maintenance of your ROLLEI Compactline Mini Digital Compact Camera. Please read this manual thoroughly before using the camera to ensure optimal performance and longevity of the device. Keep this manual for future reference.
Kamera überview
The ROLLEI Compactline Mini is a compact digital camera designed for capturing stills and video. Its small form factor makes it convenient for everyday use.

Abbildung 1: Front view of the ROLLEI Compactline Mini Digital Camera, showing the lens and Rollei branding.
Aufstellen
1. Einlegen der Batterie
The camera uses a Lithium Ion battery (not included). Ensure you purchase a compatible battery. To install:
- Suchen Sie die Abdeckung des Batteriefachs an der Unterseite der Kamera.
- Schieben Sie den Deckelriegel, um das Fach zu öffnen.
- Insert the Lithium Ion battery according to the polarity indicators inside the compartment.
- Schließen Sie den Batteriefachdeckel fest, bis er einrastet.
2. Einlegen der Speicherkarte
The camera requires a memory card (not included) to store photos and videos. To insert a memory card:
- Open the battery compartment cover, as the memory card slot is typically located within or adjacent to it.
- Insert the memory card into the designated slot with the contacts facing the correct direction, usually indicated by a small icon.
- Drücken Sie die Karte vorsichtig, bis sie einrastet.
- Schließen Sie den Batteriefachdeckel.

Abbildung 2: Unten view der Kamera, wobei das Batteriefach und das Speicherkartenfach abgebildet sind.
3. Ein-/Ausschalten
To power on the camera, press and hold the power button located on the top of the camera. To power off, press and hold the power button again.

Abbildung 3: Spitze view of the camera, highlighting the power button (left) and shutter button (right).
Bedienung der Kamera
The camera features a rear display and control buttons for navigation and function selection.
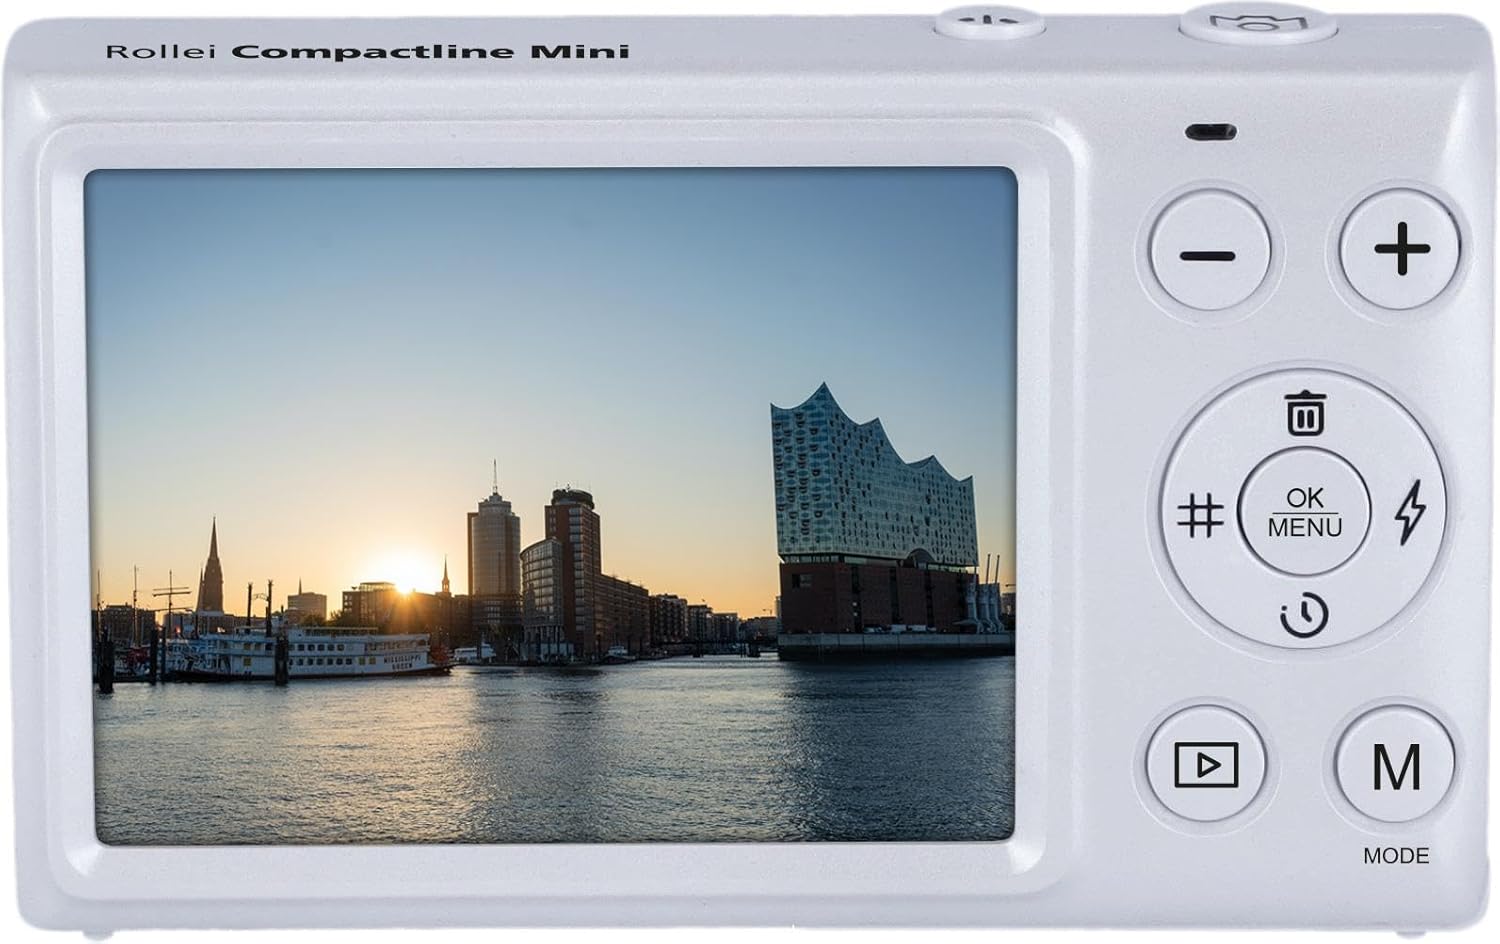
Abbildung 4: Hinteren view of the camera, displaying the screen and control panel.
1. Fotos machen
- Ensure the camera is in photo mode. Press the 'M' (Mode) button to cycle through available modes until the photo icon is displayed.
- Verwenden Sie den Bildschirm, um den Bildausschnitt festzulegen.
- Press the shutter button (located on the top of the camera) fully to capture the image. The camera uses automatic exposure control.
2. Videos aufnehmen
- Press the 'M' (Mode) button to select video recording mode (indicated by a movie camera icon).
- Press the shutter button to start recording. A recording indicator will appear on the screen.
- Drücken Sie den Auslöser erneut, um die Aufnahme zu stoppen.
3. Menünavigation und Einstellungen
Use the control buttons on the back of the camera to navigate menus and adjust settings:
- OK/MENU Button: Press to access the main menu or confirm selections.
- Auf-/Ab-Tasten (+/-): Dient zum Durchblättern der Menüoptionen oder zum Anpassen von Werten.
- Left/Right Buttons (#/Flash): Use for specific shortcuts or navigation within menus. The button marked with a flash symbol may control the self-timer or other functions, as the camera does not have a built-in flash.
Einstellungen für den Weißabgleich
To adjust white balance, navigate to the white balance setting in the menu. Available options include: Auto, Cloudy, Daylight, Fluorescent, Incandescent. Select the setting that best matches your lighting conditions for accurate color reproduction.
4. Wiedergabemodus
Zu view Ihre aufgenommenen Fotos und Videos:
- Press the Playback button (often indicated by a triangle symbol).
- Use the Up/Down buttons to scroll through your media.
- Drücken Sie die OK-Taste bis view ein Video oder ein größeres Bild.
5. Löschen Files
In Playback mode, select the image or video you wish to delete. Press the Delete button (often indicated by a trash can icon) and confirm your selection when prompted.
Wartung
1. Reinigung der Kamera
- Kameragehäuse: Verwenden Sie ein weiches, trockenes Tuch, um das Kameragehäuse abzuwischen. Bei hartnäckigem Schmutz leicht andrücken.ampBefeuchten Sie das Tuch mit Wasser. Vermeiden Sie aggressive Chemikalien.
- Linse: Verwenden Sie einen Linsenpinsel oder einen Blasebalg, um Staub zu entfernen. Für Fingerabdrücke verwenden Sie ein spezielles Linsenreinigungstuch und Linsenreinigungsmittel. Berühren Sie die Linsenoberfläche nicht mit den Fingern.
- Bildschirm: Use a soft, lint-free cloth to gently wipe the display screen.
2. Speicherung
Bewahren Sie die Kamera bei Nichtgebrauch an einem kühlen, trockenen Ort, geschützt vor direkter Sonneneinstrahlung und extremen Temperaturen, auf. Entfernen Sie den Akku, wenn die Kamera längere Zeit nicht benutzt wird, um ein Auslaufen zu verhindern.
Fehlerbehebung
- Die Kamera lässt sich nicht einschalten:
- Ensure the battery is correctly inserted and fully charged.
- Check if the battery compartment cover is securely closed.
- If using a new battery, ensure it is compatible and charged. - Die Bilder sind unscharf:
- Stellen Sie sicher, dass die Linse sauber und frei von Fingerabdrücken oder Staub ist.
- Hold the camera steady when taking photos.
- Ensure sufficient lighting for the scene. - Speicherkartenfehler:
- Ensure the memory card is correctly inserted.
- Try formatting the memory card (this will erase all data, so back up important files zuerst).
- Try a different, compatible memory card. - Die Kamera friert ein oder reagiert nicht:
- Remove the battery, wait a few seconds, and reinsert it to perform a soft reset.
- Sollte das Problem weiterhin bestehen, wenden Sie sich bitte an den Kundendienst.
Technische Daten
| Besonderheit | Spezifikation |
|---|---|
| Modellname | Compactline Mini |
| Modellnummer | 10854 |
| Fotosensor-Technologie | CMOS |
| Unterstützt File Formate | JPEG, MP4 |
| Seitenverhältnis | 4:3 |
| Minimale Verschlusszeit | 1/2 Sekunden |
| Art der Expositionskontrolle | Automatisch |
| Formfaktor | Kompakt |
| Kamera-Blitz | No built-in flash |
| Aufnahmemodi | Movie, Stills |
| ViewFinder | Optisch |
| Einstellungen für den Weißabgleich | Auto, Cloudy, Daylight, Fluorescent, Incandescent |
| Kompatible Geräte | Computers (for data transfer) |
| Akku-Typ | Lithium Ion (not included) |
| Wasserbeständigkeit | Nicht wasserfest |
| Lichtempfindlichkeit | ISO 100-800 |
| Audioaufnahme | NEIN |
| Hat Farbbildschirm | NEIN |
| Display Maximum Resolution | 12 Megapixel |
| Objektivtyp | Behoben |
| Autofokus-Technologie | Kontrasterkennung |
| Fokustyp | Fester Fokus |
| Fokus-Modus | Automatischer AF (AF-A) |
Garantie und Support
For warranty information, please refer to the warranty card included with your product or visit the official Rollei website. For technical support, troubleshooting assistance beyond this manual, or service inquiries, please contact Rollei customer service through their official channels.


