1. Produktüberschreitungview
The YESWELDER MIG-185DS PRO is a versatile 5-in-1 multi-process welding machine designed for a wide range of welding applications. It supports Gasless Flux Core MIG, Gas MIG, Spool Gun MIG (for aluminum), Lift TIG, and Stick welding. This unit features an advanced digital display and synergic control for ease of use, making it suitable for both beginners and experienced professionals.

Image 1.1: The YESWELDER MIG-185DS PRO welding machine shown with its included accessories, including the MIG torch, ground clamp, and power cable.
2. Hauptmerkmale
- 5-in-1-Multifunktionalität: Supports Gasless Flux Core MIG, Gas MIG, Spool Gun MIG, Lift TIG, and Stick welding.
- Aluminum MIG Capability: Compatible with an additional aluminum spool gun for high-quality aluminum welding.
- 185 Amp Ausgabe: Provides robust and stable welding performance.
- Kabelkompatibilität: Works with 2LB/10LB .023''/.030''/.035''/.040'' welding wire.
- Synergische MIG-Steuerung: Automatically matches voltage to wire feeding speed for simplified setup, ideal for beginners.
- Manual MIG Control: Allows experienced users to manually adjust wire feeding speed and voltage.
- Digitaler Bildschirm: Advanced LED display for clear visual feedback and improved operational efficiency.
- Stick Welding Enhancements: Adjustable Hot Start, Arc Force, and Anti-Stick functions.

Abbildung 2.1: Detailansicht view of the intelligent digital screen display, showing various welding parameters and mode selections.

Image 2.2: Visual representation of the five welding processes supported by the machine: Gas MIG, Flux Core, Stick, Lift TIG, and Spool Gun welding.
3. Wichtige Sicherheitshinweise
Welding can be hazardous. Always follow safety precautions to prevent injury or damage. Read and understand all safety warnings before operating this equipment.
- Elektrischer Schock: Can kill. Ensure proper grounding. Do not touch live electrical parts. Wear dry insulating gloves and protective clothing.
- Dämpfe und Gase: Kann gesundheitsschädlich sein. Halten Sie Ihren Kopf von den Dämpfen fern. Sorgen Sie für Belüftung oder Absaugung, um die Dämpfe aus dem Atembereich zu entfernen.
- Lichtbogenstrahlen: Can burn eyes and skin. Wear a welding helmet with a proper shade filter. Wear appropriate protective clothing.
- Feuer und Explosion: Schweißfunken können Brände oder Explosionen verursachen. Halten Sie brennbare Materialien vom Schweißbereich fern. Halten Sie einen Feuerlöscher griffbereit.
- Heiße Teile: Kann schwere Verbrennungen verursachen. Gerät vor dem Berühren abkühlen lassen.
- Lärm: Zu viel Lärm kann das Gehör schädigen. Tragen Sie Gehörschutz.
- Herzschrittmacher: Magnetfelder, die von hohen Strömen ausgehen, können Herzschrittmacher beeinträchtigen. Konsultieren Sie vor dem Schweißen Ihren Arzt.
4. Ersteinrichtung
4.1 Stromanschluss
Connect the welder to a suitable power supply (110V or 220V) using the provided power cord. Ensure the power outlet is properly grounded and can handle the required amperage für Ihre Schweißarbeiten.
4.2 Gasanschluss (für Gas-MIG)
For Gas MIG welding, connect your shielding gas cylinder (e.g., Argon, CO2, or Argon/CO2 mix) to the gas inlet on the rear of the machine using a gas hose and regulator. Ensure all connections are tight to prevent leaks.
4.3 Drahtinstallation (MIG/Fülldraht)
Open the wire feed compartment. Install the appropriate welding wire spool (2LB or 10LB) onto the spindle. Thread the wire through the drive rollers and into the liner of the MIG torch. Ensure the drive rollers are set to the correct wire size and tension.
4.4 Taschenlampe und Erdungamp Verbindung
Connect the MIG torch to the appropriate connector on the front panel. Attach the ground clamp cable to the designated terminal and secure the ground clamp to your workpiece or welding table, ensuring good electrical contact.

Image 4.1: A welder utilizing a spool gun, demonstrating its compatibility for aluminum welding with the MIG-185DS PRO.
5. Bedienungsanleitung
5.1 MIG Welding (Gas MIG / Flux Core)
Select the MIG mode on the control panel. Choose between Gas MIG (with shielding gas) or Flux Core (gasless). For Synergic MIG, select the material type and wire diameter, and the machine will suggest optimal voltage and wire speed. For Manual MIG, adjust voltage and wire speed independently to suit your specific needs.
5.2 Spool Gun MIG (Aluminum Welding)
To weld aluminum, connect a compatible spool gun (sold separately) to the designated port. Load aluminum wire into the spool gun. Select the Spool Gun MIG mode and adjust settings according to the aluminum thickness and wire diameter.
5.3 Lift TIG-Schweißen
Connect a Lift TIG torch (sold separately) and a gas supply (typically Argon). Select Lift TIG mode. To initiate the arc, lightly touch the tungsten electrode to the workpiece and then lift it slightly. The machine will automatically start the arc.
5.4 Stick Welding
Schließen Sie den Elektrodenhalter und die Erdungsklemme an.amp. Select Stick mode. Insert the appropriate electrode into the holder. Adjust amperage based on the electrode type and material thickness. Utilize the adjustable Hot Start, Arc Force, and Anti-Stick features for improved arc control.
5.5 Using YESWELDER Welding Nozzle Gel
The included YESWELDER Welding Nozzle Gel helps prevent spatter build-up on MIG torch nozzles and contact tips, ensuring smoother wire feeding and extending consumable life. Dip the hot MIG torch nozzle into the gel periodically during welding operations.

Image 5.1: Two containers of YESWELDER Welding Nozzle Gel, designed to protect MIG torch consumables.

Image 5.2: Demonstrating the application of YESWELDER Welding Nozzle Gel by dipping the MIG torch nozzle into the container.

Image 5.3: Visual comparison illustrating the benefits of using welding nozzle gel, showing reduced smoke, sparks, and clogging compared to welding without it.
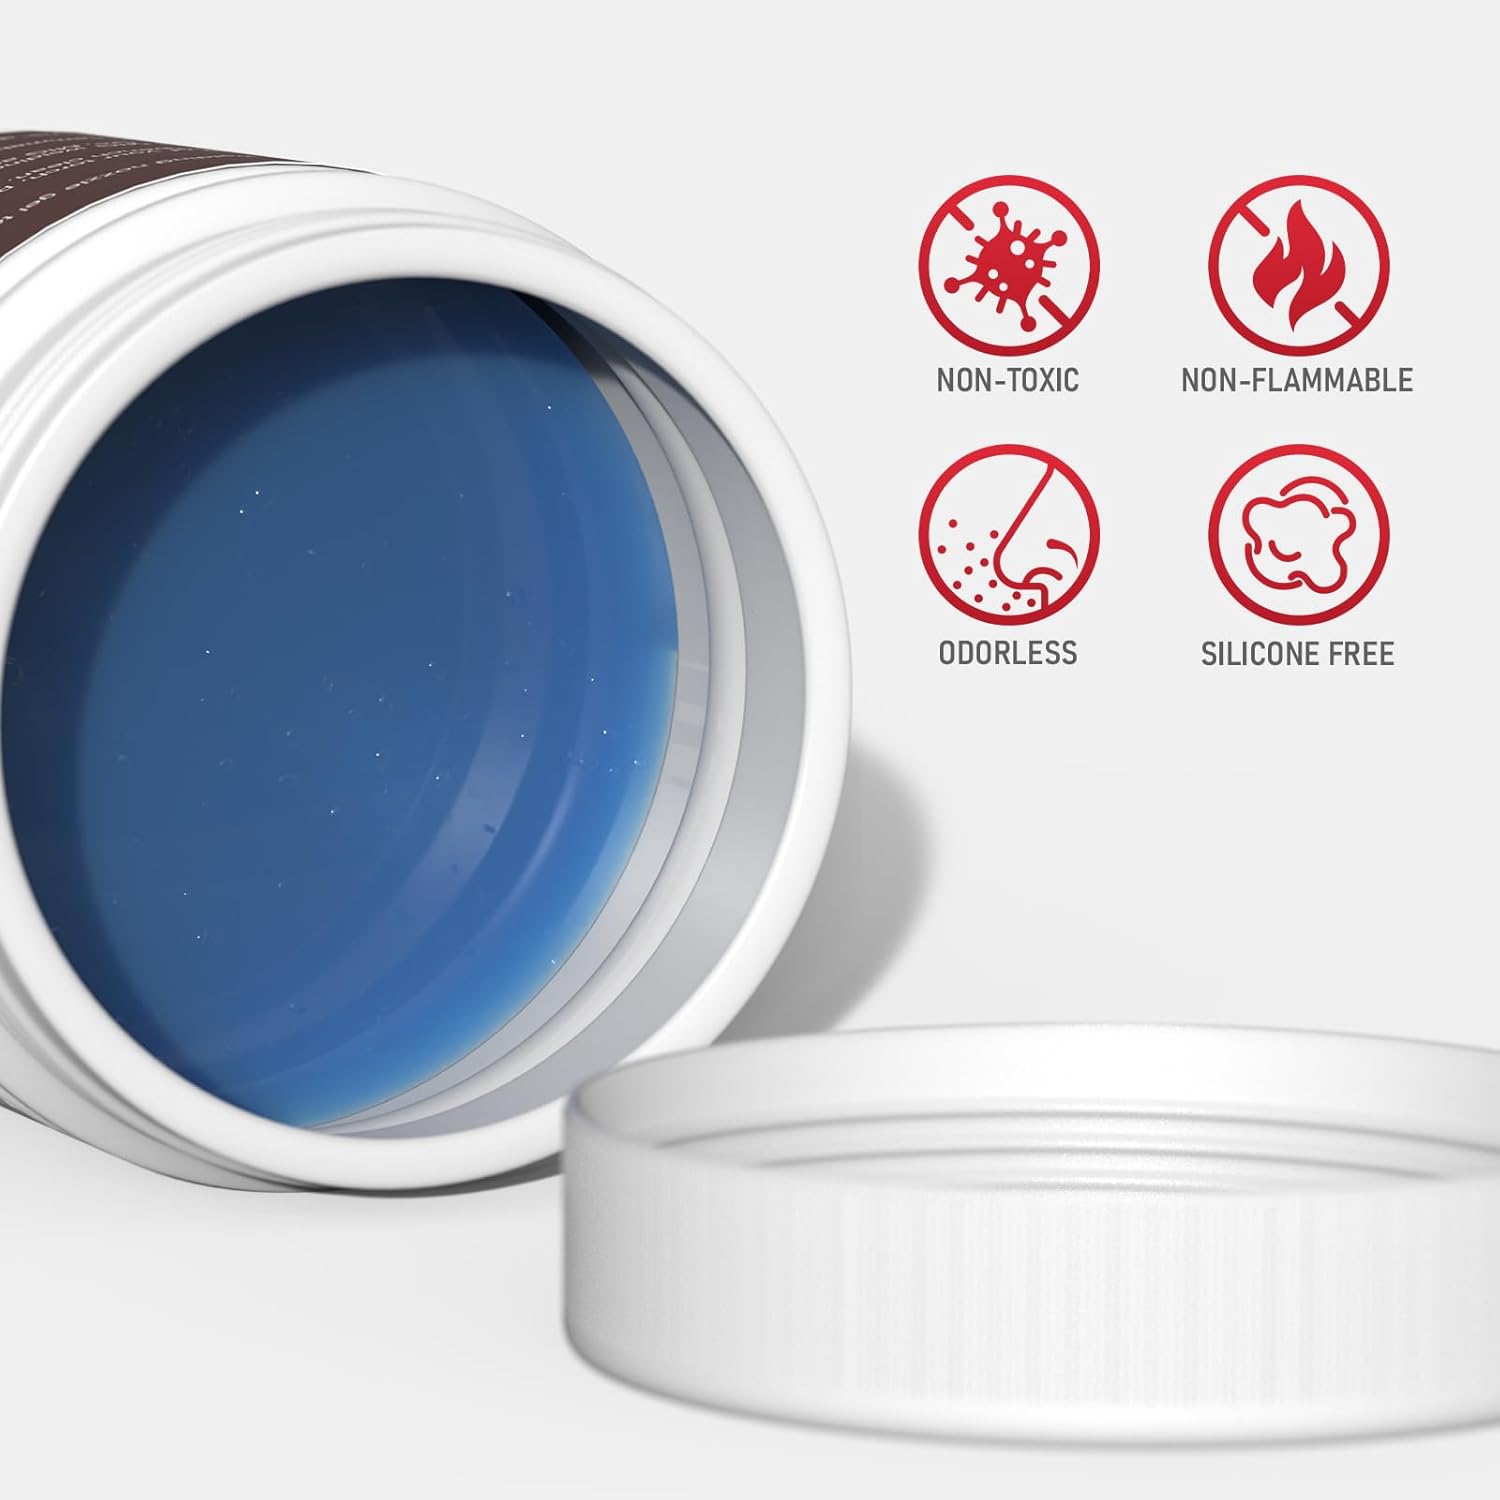
Image 5.4: Key properties of the welding nozzle gel: non-toxic, non-flammable, odorless, and silicone-free.
6. Wartung
Regular maintenance ensures optimal performance and extends the lifespan of your welding machine.
- Reinigung: Periodically clean the interior of the machine with compressed air to remove dust and metal particles. Ensure the machine is unplugged before cleaning.
- Taschenlampen- und Kabelprüfung: Regularly inspect the MIG torch, TIG torch, electrode holder, and ground clamp cables for damage, fraying, or loose connections. Replace damaged components immediately.
- Drahtvorschubsystem: Clean the wire drive rollers and liner to prevent wire feeding issues. Ensure the drive rollers are free of debris and the liner is not kinked or clogged.
- Verbrauchsmaterial: Replace MIG nozzles, contact tips, TIG collets, and electrodes as they wear out.
- Belüftung: Ensure the cooling vents on the machine are clear and unobstructed to prevent overheating.
7. Anleitung zur Fehlerbehebung
Dieser Abschnitt bietet Lösungen für häufig auftretende Probleme.
| Problem | Mögliche Ursache | Lösung |
|---|---|---|
| Keine Stromversorgung zur Maschine | Netzkabel nicht angeschlossen, Sicherung ausgelöst, Netzschalter defekt | Überprüfen Sie den Netzkabelanschluss, setzen Sie den Sicherungsautomaten zurück und kontaktieren Sie den Kundendienst, falls der Schalter defekt ist. |
| Kein Lichtbogen | Poor ground connection, incorrect welding mode, faulty torch/electrode holder, wrong settings | Ensure good ground contact, select correct mode, check torch/holder connections, verify settings |
| Drahtzuführungsprobleme (MIG) | Incorrect drive roller tension, clogged liner, wrong drive roller size, spatter in nozzle/tip | Adjust roller tension, clean/replace liner, ensure correct roller size, clean nozzle/tip with gel |
| Mangelhafte Schweißqualität | Falsche Lautstärketage/amperage, improper wire speed, insufficient shielding gas, dirty workpiece | Adjust settings, check gas flow, clean workpiece thoroughly |
| Überhitzungsschutz aktiviert | Überschreitung des Betriebszyklus, blockierte Belüftung | Maschine abkühlen lassen, für freie Belüftung sorgen |
8. Technische Daten
| Spezifikation | Wert |
|---|---|
| Modell | MIG-185DS PRO |
| ASIN | B0FS6V2TMM |
| Eingangslautstärketage | 110 V/220 V Doppelvoltage |
| Ausgangsstrom | 185 Amps (max.) |
| Schweißverfahren | Flux Core MIG, Gas MIG, Spool Gun MIG, Lift TIG, Stick |
| Drahtspulenkapazität | 2LB / 10LB |
| Kompatibilität des Drahtdurchmessers | .023''/.030''/.035''/.040'' |
9. Garantie und Kundendienst
For warranty information, technical support, or service inquiries, please refer to the warranty card included with your product or visit the official YESWELDER website. You may also contact YESWELDER customer service directly for assistance with your MIG-185DS PRO welder.
Kontaktinformationen: Please refer to your product packaging or the official YESWELDER webHier finden Sie die aktuellsten Kontaktdaten des Kundensupports.


