1. Einleitung
The WORKPRO Mini Pliers Wrench, Model W031503, is a compact and versatile hand tool designed for precision tasks and use in tight spaces. Its unique design combines the functionality of pliers and a wrench, offering efficient operation without damaging workpieces.
Hauptmerkmale:
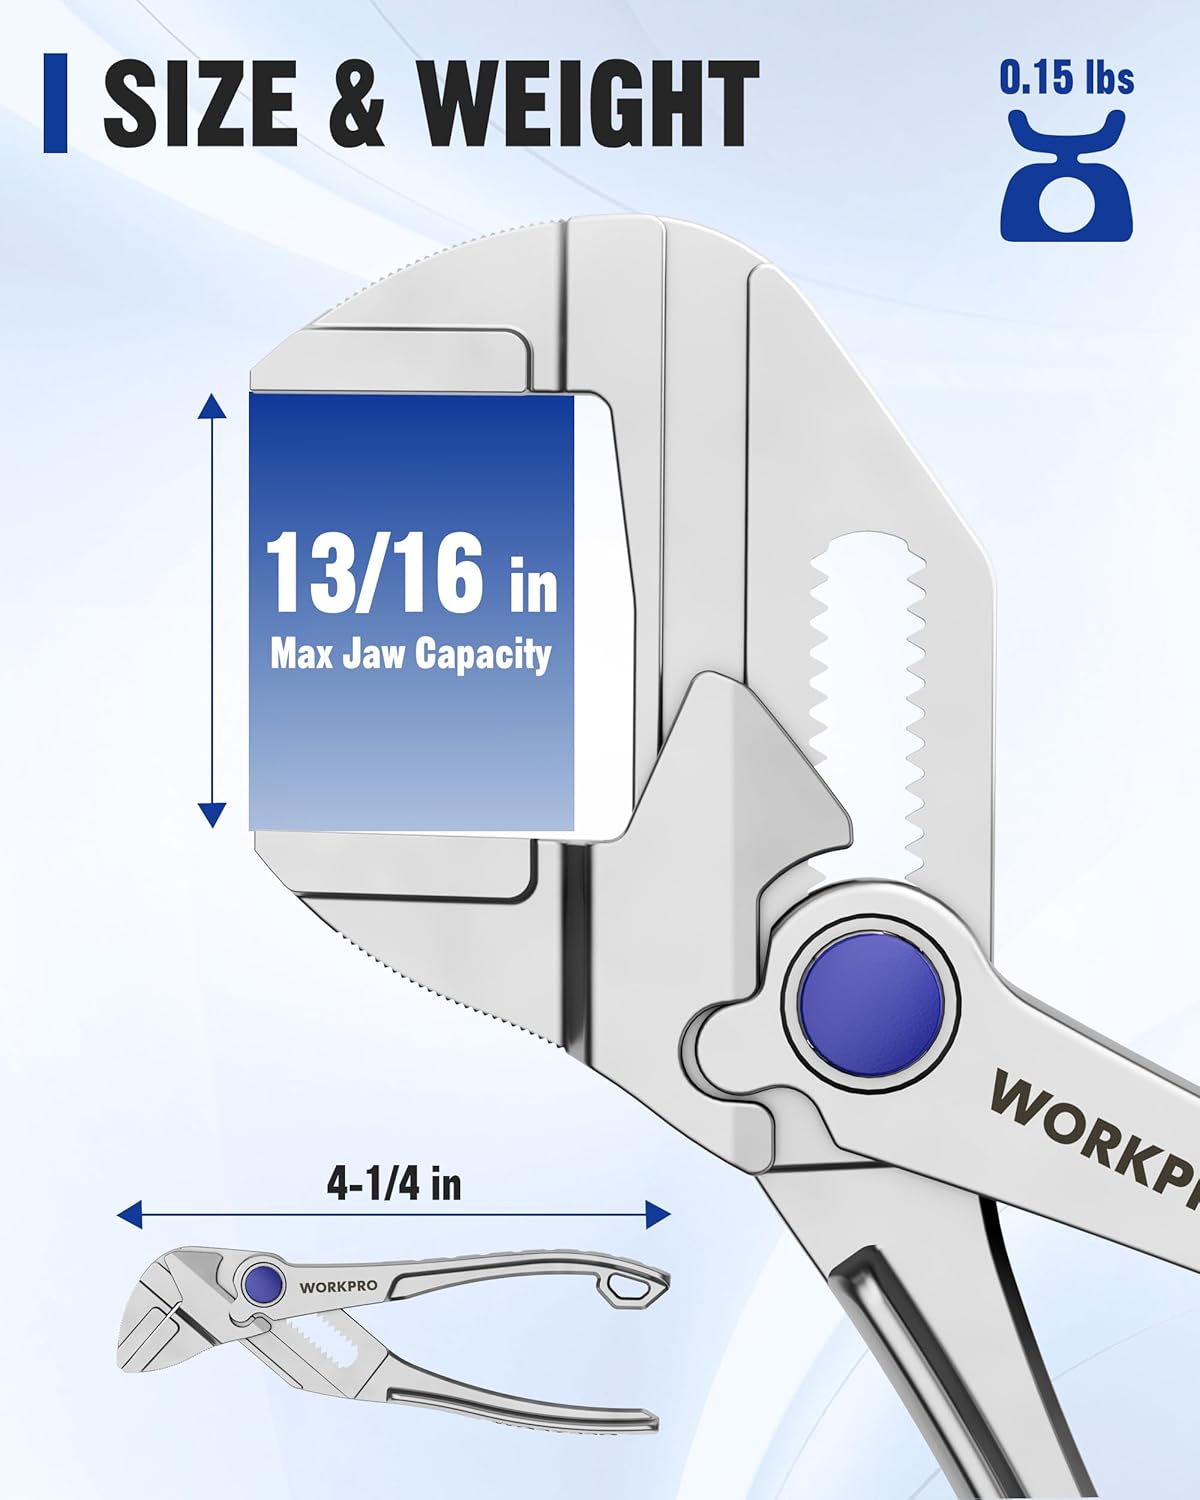
- Kompakte Größe: At just 4 inches, it delivers powerful gripping performance in a compact design, ideal for precision tasks and confined areas.
- Parallel Smooth Jaws: Designed to apply even pressure across flat surfaces, preventing rounding or scratching of delicate components and finished fittings.
- Fast Adjustment: Features a quick adjustment mechanism for easy size changes, serving as a versatile alternative to multiple wrenches.
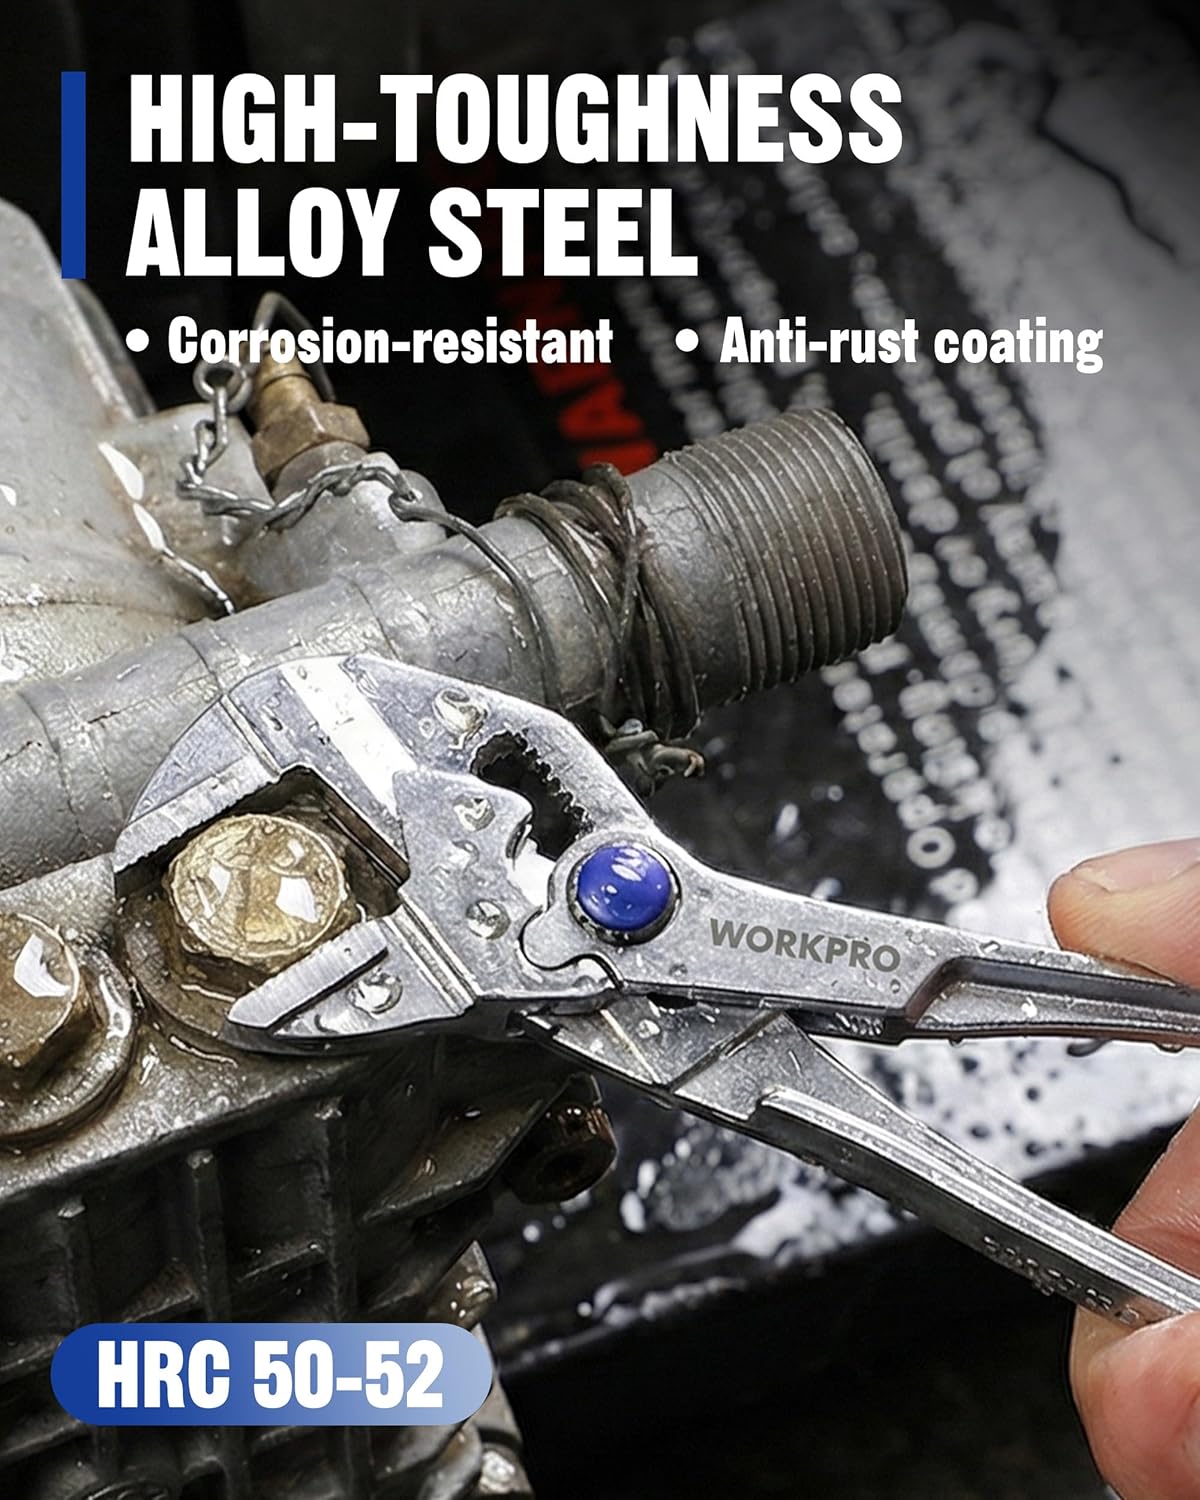
- High-Toughness Alloy Steel: Constructed from heat-treated alloy steel for enhanced durability, corrosion resistance, and an anti-rust coating.
- Mehrzweck: Suitable for everyday carry (EDC), bike maintenance, small plumbing tasks, electronics work, and general home repairs.

This manual provides essential information for the safe and effective use, maintenance, and troubleshooting of your WORKPRO Mini Pliers Wrench.
2. Sicherheitshinweise
Always observe basic safety precautions when using any hand tool to reduce the risk of injury. Read and understand all instructions before operation.
Allgemeine Sicherheitsrichtlinien:
- Augenschutz tragen: Tragen Sie stets eine ANSI-geprüfte Schutzbrille oder eine Schutzbrille mit Seitenschutz.
- Werkzeug vor Gebrauch prüfen: Check for any damage, wear, or loose parts. Do not use a damaged tool.
- Verwenden Sie das richtige Werkzeug: Select the appropriate size and type of tool for the task.
- Halten Sie den Arbeitsbereich sauber: Ensure your workspace is well-lit and free from clutter.
- Einen sicheren Halt bewahren: Always hold the tool firmly to prevent slipping.
- Vermeiden Sie ein zu festes Anziehen: Do not apply excessive force that could damage the workpiece or the tool.
- Sicher aufbewahren: Keep tools out of reach of children and in a dry, secure location.
3. Komponenten
The WORKPRO Mini Pliers Wrench consists of the following primary components:
- Parallel Jaws: Smooth, flat gripping surfaces designed to prevent damage to fasteners.
- Einstellknopf: A blue button located on the side for quick and easy jaw width adjustment.
- Handhaben: Ergonomisch gestaltet für komfortablen Griff und optimale Hebelwirkung.
- Ratschenmechanismus: Allows for continuous tightening or loosening without repositioning the tool.
- Lanyard-Loch: Located at the end of the handle for attaching a lanyard or keychain for easy access and storage.
4. Einrichtung und Justierung
The WORKPRO Mini Pliers Wrench features a quick adjustment system for efficient operation.
Adjusting Jaw Width:
- Drücken Sie den Knopf: Locate the blue adjustment button on the side of the pliers wrench. Press and hold this button.
- Slide the Jaw: While holding the button, slide the movable jaw to the desired opening width. The tool offers 14 distinct adjustment positions.
- Release the Button: Release the button to lock the jaw in place. Ensure the jaw is securely locked before applying force.

5. Bedienungsanleitung
The WORKPRO Mini Pliers Wrench is designed for gripping, holding, pressing, and bending applications, particularly where surface protection is critical.
Using the Pliers Wrench:
- Kieferöffnung auswählen: Adjust the jaw width to fit the workpiece snugly, as described in Section 4.
- Positionieren Sie die Kiefer: Place the parallel smooth jaws around the fastener or workpiece. Ensure full contact with the flat surfaces to maximize grip and prevent damage.
- Druck ausüben: Squeeze the handles firmly to engage the ratchet mechanism. The parallel jaws will maintain even pressure.
- Tighten or Loosen: Use the ratchet action to continuously tighten or loosen the fastener without needing to remove and reposition the tool.


Anwendungen:
This tool is particularly effective for:
- Working on chrome-plated or delicate fittings without marring.
- Accessing fasteners in confined or hard-to-reach areas.
- Automotive maintenance, plumbing, and bicycle repairs.
- General assembly and disassembly tasks requiring precise grip.


6. Wartung
Proper maintenance ensures the longevity and optimal performance of your WORKPRO Mini Pliers Wrench.
Reinigung und Lagerung:
- Nach Gebrauch reinigen: Wipe the pliers wrench clean with a dry cloth after each use to remove dirt, grease, and moisture.
- Schmierung: Periodically apply a light coat of machine oil to the pivot points and adjustment mechanism to ensure smooth operation and prevent corrosion.
- Anti-Rust Coating: The tool features an anti-rust coating, but regular cleaning and lubrication will further protect it from environmental elements.
- Lagerung: Store the tool in a dry environment, away from excessive humidity or corrosive substances.

7. Fehlerbehebung
If you encounter issues with your WORKPRO Mini Pliers Wrench, refer to the following common problems and solutions:
| Problem | Mögliche Ursache | Lösung |
|---|---|---|
| Jaws are stiff or difficult to adjust. | Lack of lubrication, dirt accumulation. | Clean the adjustment mechanism and pivot points. Apply a light machine oil. |
| Tool slips on workpiece. | Incorrect jaw adjustment, excessive force, worn jaws. | Ensure jaws are adjusted snugly to the workpiece. Apply firm, even pressure. If jaws are worn, consider replacement. |
| Rust or corrosion appears. | Einwirkung von Feuchtigkeit oder korrosiven Umgebungen. | Clean immediately and apply anti-rust oil. Store in a dry place. |
8. Spezifikationen
| Besonderheit | Detail |
|---|---|
| Modellnummer | W031503 |
| Artikelgewicht | 2.47 Unzen |
| Technische Daten | 4.21 x 2 x 0.63 Zoll |
| Farbe | Silber |
| Material | Legierter Stahl |
| Stromquelle | Handbuch |
| Artikelpaket Menge | 1 |
| Griffmaterial | Legierter Stahl |
| Verwendung | Verdrehen |
| Im Lieferumfang enthaltene Komponenten | Zangenschlüssel |
9. Garantieinformationen
WORKPRO tools are manufactured to high-quality standards and are warranted against defects in materials and workmanship. For specific warranty terms and conditions, please refer to the warranty card included with your product or visit the official WORKPRO webWebsite.
Bewahren Sie Ihren Kaufbeleg als Kaufnachweis für eventuelle Garantieansprüche auf.
10. Kundendienst
For further assistance, technical support, or to inquire about replacement parts, please contact WORKPRO customer service:
- WebWebsite: Visit the WORKPRO Store on Amazon
- Hersteller: HANGZHOU GREATSTAR INDUSTRIAL CO.,LTD
Please have your product model number (W031503) and purchase information ready when contacting support.


