1. Sicherheitshinweise
Bitte lesen und verstehen Sie alle Anweisungen vor der Montage und Inbetriebnahme. Bewahren Sie diese Anleitung zum späteren Nachschlagen auf.
- Elektrische Sicherheit: Ensure the vanity's charging station is connected to a grounded outlet. Do not overload the outlets. Keep liquids away from electrical components.
- Montagesicherheit: Assembly requires careful attention. It is recommended to have two people for certain steps to ensure stability and prevent injury. Follow all steps in the provided assembly guide.
- Stabilität: Place the vanity on a flat, stable surface. Do not climb on or lean heavily on the vanity. Secure the vanity to the wall if necessary, especially in households with children or pets, to prevent tipping.
- Gewichtskapazität: Do not exceed the weight capacity of the glass tabletop (30 lbs) or any shelves/drawers.
- Glaspflege: The tempered glass tabletop is scratch-resistant and heat-proof, but avoid dropping heavy objects on it or applying excessive force.
- Kinder und Haustiere: Keep small parts and tools away from children and pets during assembly. Ensure drawers and cabinets are properly closed to prevent accidental access.
2. Packungsinhalt
Verify all components are present and undamaged before beginning assembly. Each component is meticulously labeled with serial numbers for easy identification.
- Schminktischgestell (Holzwerkstoff)
- 3-Way Mirror with Integrated Lights (1x 23" center mirror, 2x 12" side mirrors)
- Tischplatte aus gehärtetem Glas
- Charging Station (2 AC outlets, 1 USB port, 1 Type-C charger)
- 3 Drawers (2 top drawers, 1x 28" wide middle drawer)
- 2 Storage Cabinets with Adjustable Shelves
- Griffe aus goldenem Metall
- Montage-Hardware-Kit
- Bedienungsanleitung
3. Montageanleitung
T4TREAM Furniture streamlines the assembly process with clear, user-friendly instructions. Each component is meticulously labeled with serial numbers. While assembly is designed to be straightforward, it can be time-consuming and certain steps may require a second person for assistance, particularly when positioning the tabletops.
- Auspacken und Organisieren: Carefully unpack all components and lay them out. Identify each part using the provided labels and hardware list.
- Review Anweisungen: Read the entire assembly manual before starting. Pay close attention to diagrams and warnings.
- Grundstruktur zusammenbauen: Begin by assembling the main frame and legs according to the step-by-step guide.
- Schubladen und Schränke einbauen: Attach drawer slides and assemble the drawers and cabinet doors. Ensure smooth operation.
- Attach Tabletop and Mirror: This step often requires two people. Carefully place the main tabletop and then the mirror assembly onto the base. Connect any electrical wiring for the mirror lights and charging station as instructed.
- Letzte Anpassungen: Ensure all screws are tightened, and the vanity is stable. Adjust cabinet shelves as desired.

Image 3.1: Fully assembled T4TREAM Fluted Makeup Vanity Desk.
4. Bedienungsanleitung
4.1. 3-Way Mirror with Lights
The vanity features a three-way mirror system with integrated touch-controlled lighting. The two 12" side mirrors and a 23" center mirror provide comprehensive viewwinkeln.
- Ein-/Ausschalten: Durch Antippen des Berührungssensors am Spiegel können Sie das Licht ein- oder ausschalten.
- Helligkeit anpassen: Long press the touch sensor to adjust the brightness level from 0% to 100%.
- Farbmodus ändern: Tap the touch sensor repeatedly to cycle through the 3 lighting modes: Cool Daylight, Neutral Light, and Warm Light.

Image 4.1: Close-up of the 3-way mirror with touch control for lighting adjustments.
4.2. Integrierte Ladestation
The vanity includes a built-in charging station for convenience.
- AC-Steckdosen: Zwei 125V/12A-Wechselstromsteckdosen sind zum Anschluss von Haartrocknern vorhanden.urlBügeleisen oder andere kleine Haushaltsgeräte.
- USB/Type-C Ports: A 5V/2A USB port and a Type-C charger are available for charging mobile phones, tablets, and other compatible devices.
- Netzkabel: The vanity is equipped with a 6.5-foot power cord. Ensure it is plugged into a suitable wall outlet.
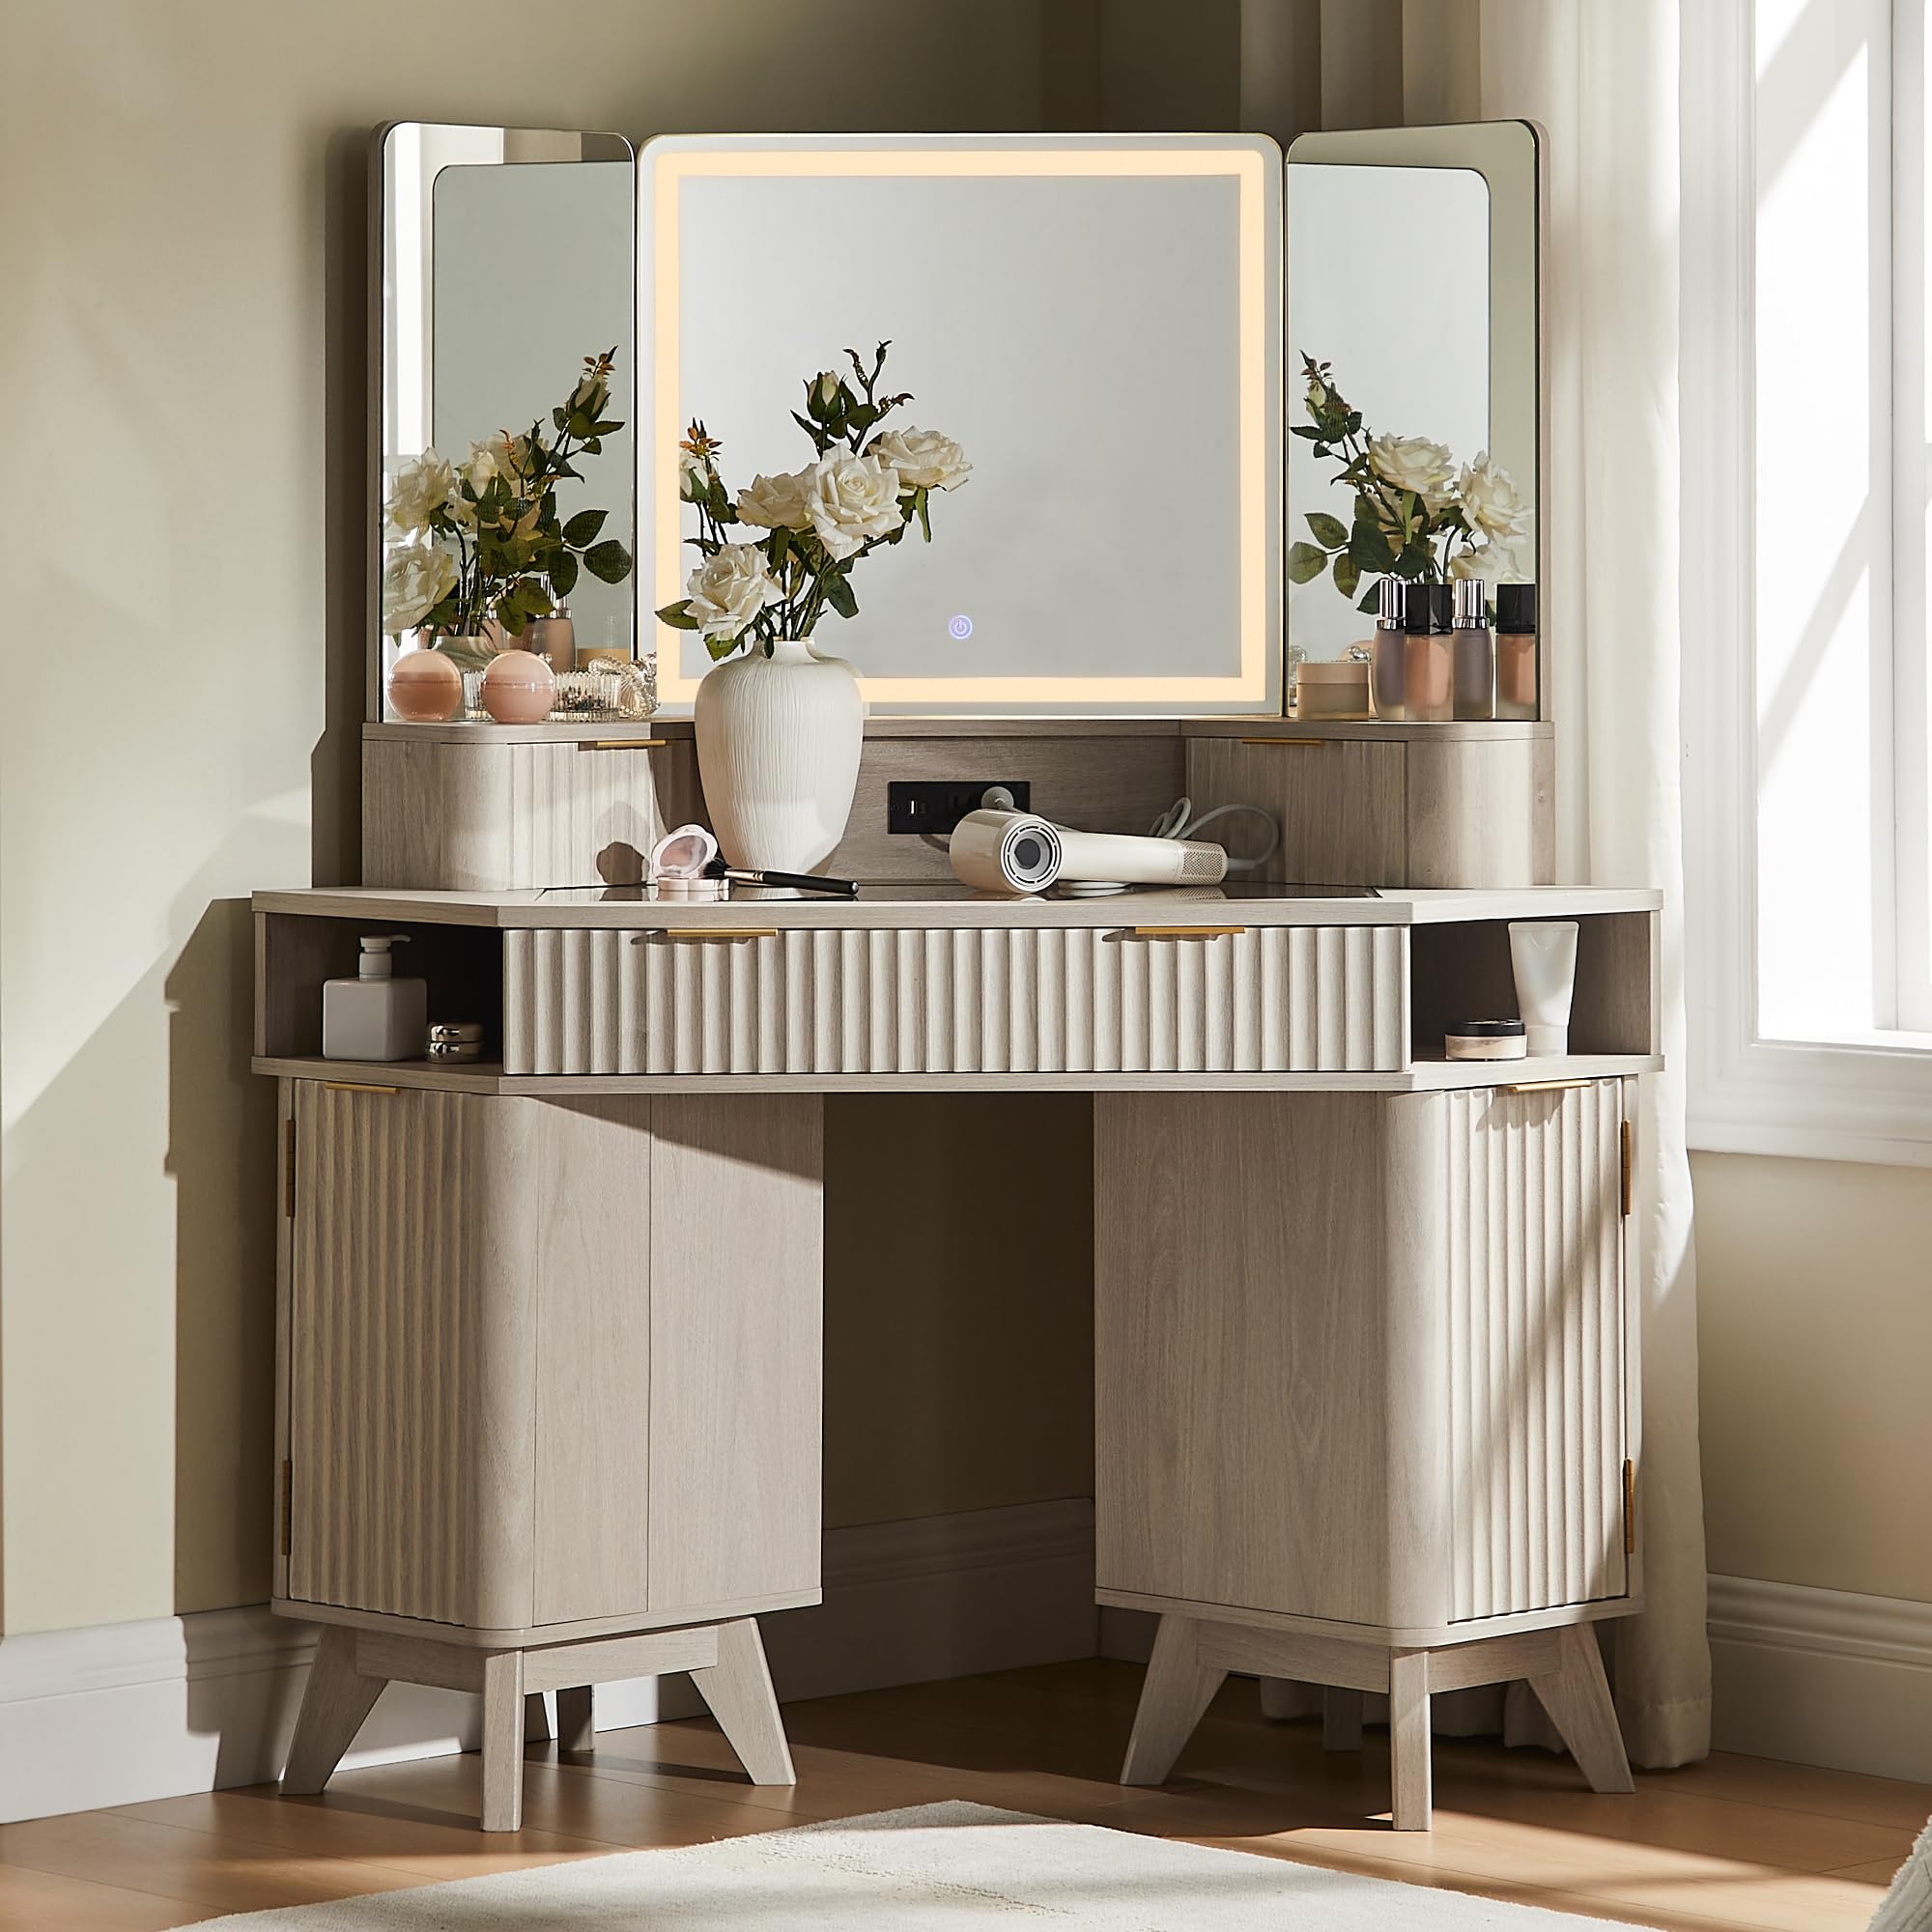
Bild 4.2: Überview of the vanity's large storage space and built-in charging station.
4.3. Aufbewahrungsmöglichkeiten
The T4TREAM vanity offers extensive storage options to keep your items organized.
- Glass Top Display: The transparent tempered glass tabletop allows for visible storage of cosmetics and accessories.
- Top Small Drawers: Two smaller drawers are located on the top section for refined storage of smaller items.
- Mittlere Schublade: A 28" wide middle drawer with a fluted panel provides ample space for various beauty products.
- Semi-Open Side Cubbies: Two semi-open cubbies offer additional accessible storage.
- Dual Storage Cabinets: Two side cabinets feature adjustable shelves for customizable storage of larger items.

Bild 4.3: View of the spacious glass tabletop and the middle drawer.

Image 4.4: Close-up of the middle drawer with chic metal handle and the left and right storage cabinets.
5. Wartung
Proper care will ensure the longevity and appearance of your T4TREAM vanity desk.
- Reinigung: Wipe with a dry cloth. For stubborn spots, use a slightly damp Mit einem milden Seifentuch abwischen und sofort trocknen. Scharfe Chemikalien oder Scheuermittel vermeiden.
- Glasplatte: Clean the tempered glass tabletop with a glass cleaner and a soft cloth.
- Elektrische Komponenten: Ensure the charging station is unplugged before cleaning. Use a dry cloth to wipe the outlets and ports.
- Hardware: Überprüfen und ziehen Sie regelmäßig lose Schrauben oder Beschläge fest, um die Stabilität zu gewährleisten.
- Vermeiden Sie direktes Sonnenlicht: Längere Einwirkung direkter Sonneneinstrahlung kann zum Ausbleichen oder zur Beschädigung der Holzoberfläche führen.
6. Fehlerbehebung
In diesem Abschnitt finden Sie Lösungen für häufig auftretende Probleme.
| Problem | Mögliche Ursache | Lösung |
|---|---|---|
| Mirror lights not working. | Power cord unplugged, faulty connection, touch sensor issue. | Ensure the vanity is plugged into a working outlet. Check all electrical connections. Try tapping and long-pressing the touch sensor. |
| Die Ladestation liefert keinen Strom. | Vanity unplugged, device not compatible, outlet overloaded. | Verify the vanity is plugged in. Test with a different device. Ensure the total power draw does not exceed the station's capacity. |
| Die Schubladen sind schwergängig oder lassen sich nicht reibungslos verschieben. | Misaligned slides, obstruction, loose hardware. | Check that drawer slides are correctly installed and aligned. Remove any items obstructing the drawer. Tighten any loose screws on the slides. |
| Die Eitelkeit wirkt instabil oder wackelig. | Uneven floor, loose assembly hardware. | Ensure the vanity is on a level surface. Re-tighten all assembly screws. Consider using anti-tip hardware if not already installed. |
7. Spezifikationen
- Modellnummer: FPSC48CVD-WTA
- Marke: T4TREAM
- Material: FSC-Certified Wood, Optimal MDF, P2 Engineered Wood, Tempered Glass, Rust-proof Coated Metal
- Farbe: White Alder
- Produktabmessungen (gesamt): 48 Zoll B x 21.44 Zoll T x 56 Zoll H
- Artikelgewicht: 130 Pfund
- Montage erforderlich: Ja
- Maximale Belastbarkeit der Tischplatte: Bis zu 30 Pfund
- Ladestation: 2x 125V/12A AC Outlets, 1x 5V/2A USB Port, 1x Type-C Charger
- Länge des Netzkabels: 6.5 Fuß
- Spiegelmerkmale: 3-Way Mirror (2x 12" side, 1x 23" center), Touch-Controlled LED Lights (Adjustable Brightness & 3 Color Modes)
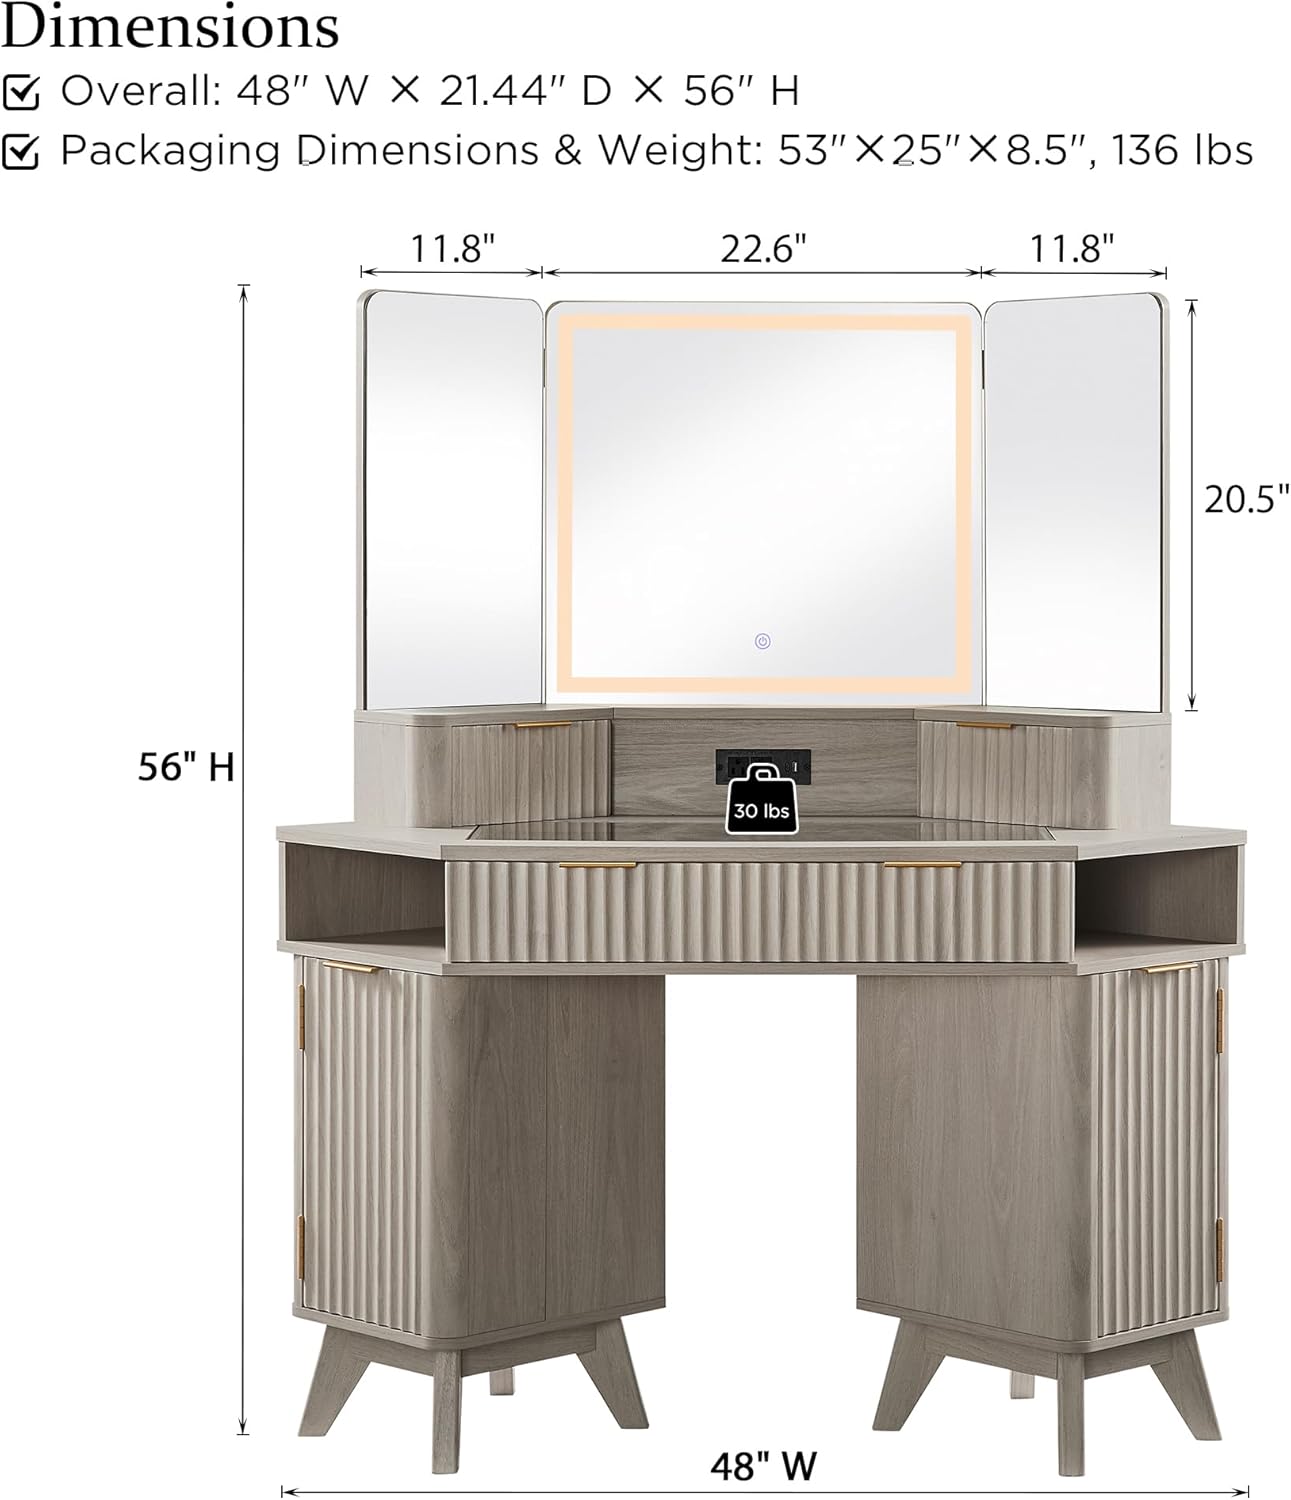
Image 7.1: Detailed dimensions of the T4TREAM Fluted Makeup Vanity Desk.
8. Garantie und Support
T4TREAM is committed to customer satisfaction. Your package is protected with Styrofoam sheets and protective boards to safeguard your vanity from harm during shipping. In case of any queries or issues, please do not hesitate to reach out to our customer support team.
- Kundendienst: For assistance with assembly, missing parts, or product concerns, please contact T4TREAM customer support. Refer to the contact information provided on the packaging or the official T4TREAM webWebsite.
- Garantieinformationen: Die genauen Garantiebedingungen finden Sie in der Regel in Ihrer Produktdokumentation. Bitte bewahren Sie Ihren Kaufbeleg für Garantieansprüche auf.


