Einführung
This manual provides detailed instructions for the assembly and operation of the ROBOTIME ST003 Luminous Globe 3D Wooden Puzzle. This kit allows you to construct a functional globe model featuring automatic rotation, an integrated LED light, and a magnification lens. Please read all instructions carefully before beginning assembly.
Lieferumfang
Upon opening your ROBOTIME ST003 kit, you should find the following components:
- Laser-cut wooden sheets (labeled A to G)
- Plastic pieces for the globe sphere
- Bedienungsanleitung
- LED-Lichtmodul und Verkabelung
- Motor and gear components
- USB-Typ-C-Stromkabel
- Small piece of sandpaper
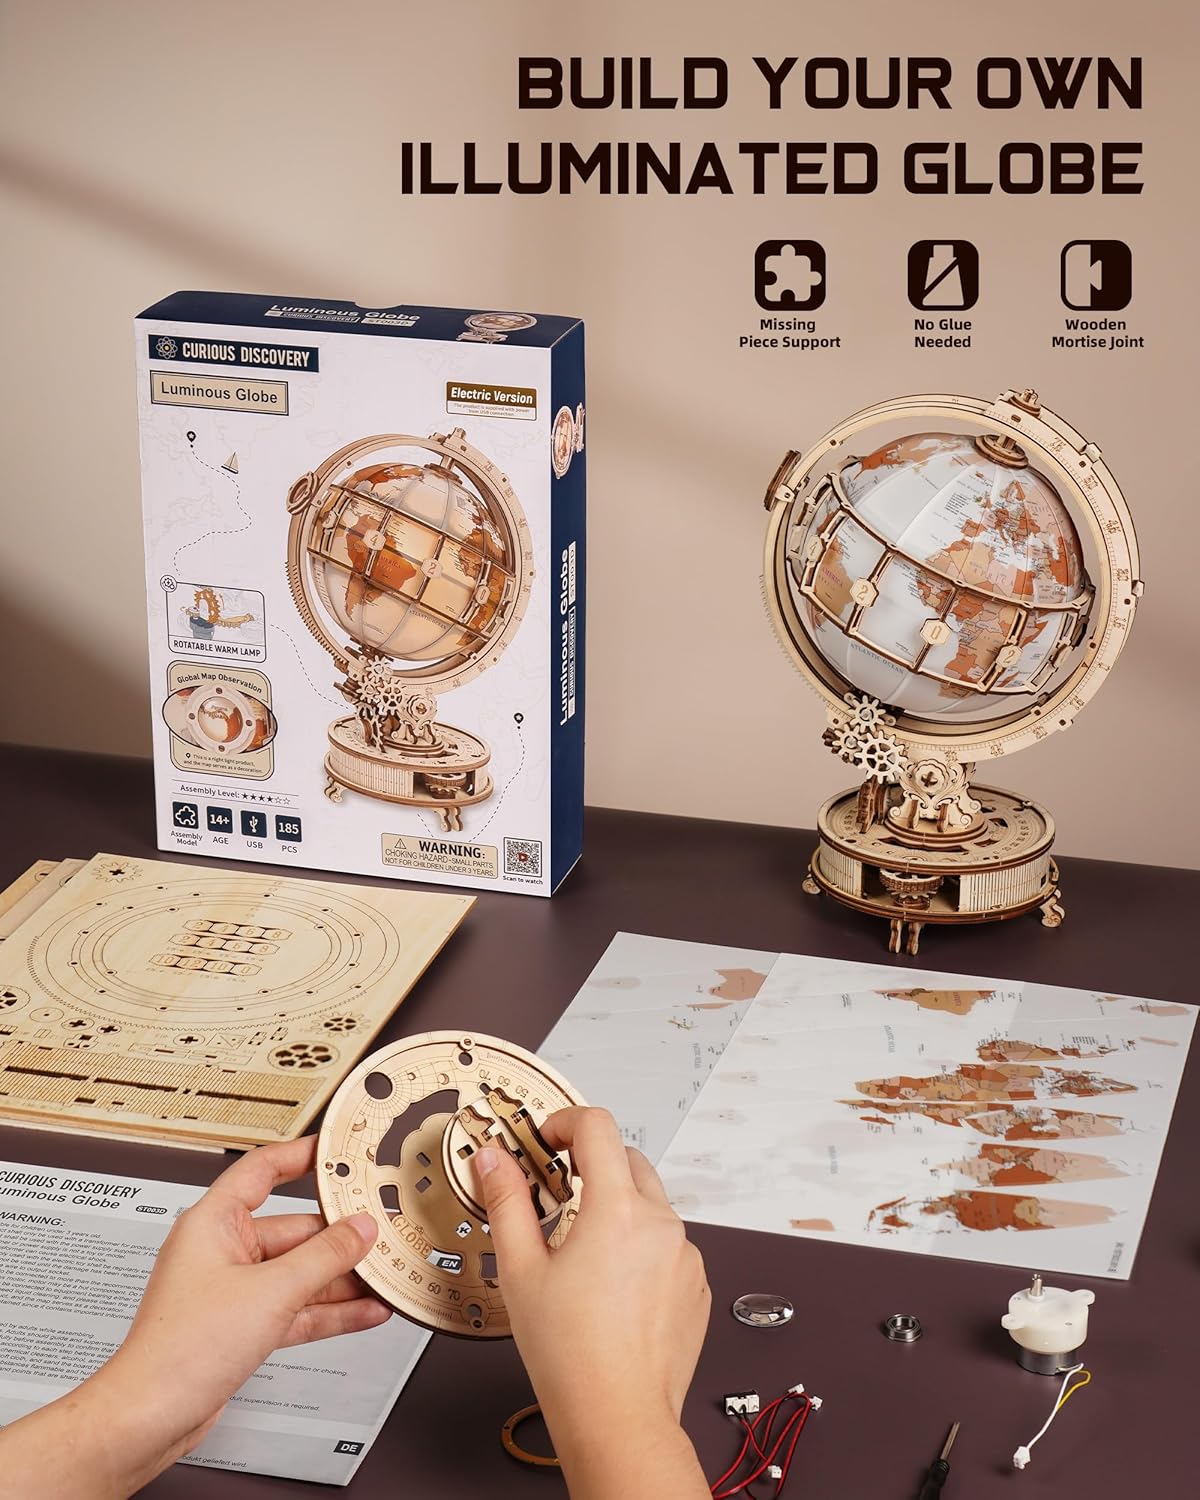
Image: Contents of the ROBOTIME ST003 Luminous Globe kit, including laser-cut wooden sheets, instructions, and initial assembly steps. The image shows the product box, various wooden sheets, the instruction booklet, and small components laid out on a table, indicating the beginning of the assembly process.
Sicherheitshinweise
- Altersempfehlung: Dieses Produkt wird für Personen ab 14 Jahren empfohlen.
- Kleine Teile: Das Set enthält Kleinteile, die verschluckt werden können. Außerhalb der Reichweite von Kleinkindern aufbewahren.
- Scharfe Kanten: Exercise caution when removing pieces from the wooden sheets, as some edges may be sharp.
- Elektrische Komponenten: Handle the LED and motor components with care. Do not attempt to modify the electrical wiring.
- Belüftung: Assemble in a well-ventilated area.
Montageanleitung
The ROBOTIME ST003 utilizes advanced laser-cutting technology and traditional mortise and tenon joints for a precise, glue-free assembly. Follow the included paper instructions carefully, as they provide detailed visual guides for each step.
- Vorbereitung: Carefully punch out or cut loose all wooden pieces from their sheets. Use the provided sandpaper to gently smooth any small burrs or rough edges on the pieces. This ensures a better fit and smoother operation.
- Initial Electrical Test: Before fully integrating, connect the LED light and motor components to the 'C' connector and a power source (e.g., a USB adapter) to verify they are functional. Disconnect after testing.
- Folgen Sie dem Handbuch: Proceed with assembly strictly according to the step-by-step diagrams in the instruction manual. Pay close attention to the orientation of each piece.
- Mortise and Tenon Joints: The pieces are designed to fit snugly. Do not force pieces together. If a piece does not fit, re-check its orientation and ensure any burrs have been removed.
- Getriebebaugruppe: When assembling the gears, ensure they mesh smoothly. Proper alignment is crucial for the automatic rotation function.
- Globe Sphere: Assemble the plastic globe pieces according to the instructions, ensuring the internal LED light module is correctly positioned.

Image: Hands assembling wooden puzzle pieces for the ROBOTIME ST003 Luminous Globe. This image illustrates the hands-on process of fitting the laser-cut wooden components together, emphasizing the precision required for assembly.

Image: Close-up of a mortise and tenon joint used in the ROBOTIME ST003 Luminous Globe assembly. This detailed view highlights the interlocking design of the wooden pieces, which allows for a secure, glue-free connection.
Bedienungsanleitung
Powering the Globe
Connect the provided USB Type-C cable to the port located on the base of the globe and plug the other end into a compatible USB power adapter (not included) or a USB port on a computer.

Bild: Detailliert view of the Type-C power charging port and internal gears of the ROBOTIME ST003 Luminous Globe. This close-up shows the Type-C input port on the side of the globe's base, along with visible wooden gears.
Automatische Rotation
The globe features an automatic rotation mechanism. To activate or deactivate this function, locate the control button on the base:
- To Start Rotation: Rotate the control button counter-clockwise. The globe will begin to rotate automatically.
- To Stop Rotation: Rotate the control button clockwise. The globe will then remain stationary.

Image: Diagram illustrating the control mechanism for automatic rotation on the ROBOTIME ST003 Luminous Globe. This image shows two hands interacting with a knob on the globe's base, with arrows indicating counter-clockwise rotation to start and clockwise rotation to stop the globe's movement.
LED-Licht
Once powered, the internal LED light will illuminate the globe, creating a warm and gentle glow. The light operates in conjunction with the power supply and does not have a separate on/off switch.

Image: ROBOTIME ST003 Luminous Globe emitting a soft, gentle light. The assembled globe is shown illuminated in a room setting, demonstrating the warm glow provided by its internal LED light.
Vergrößerungslinse
The globe includes a 3X magnification lens for closer examination of geographical details. To use the lens, rotate the small knob located near the lens to adjust its position up or down, bringing the desired area into focus.

Image: Close-up of the 3X magnification lens feature on the ROBOTIME ST003 Luminous Globe. This image details the magnifying lens and the small knob used to adjust its position, allowing for a magnified view of the globe's surface.
Wartung
- Reinigung: To clean the globe, gently wipe with a soft, dry cloth. Avoid using abrasive cleaners or excessive moisture, which could damage the wood or electrical components.
- Abstauben: Regularly dust the gears and moving parts to ensure smooth operation.
- Lagerung: Store the globe in a dry environment, away from direct sunlight and extreme temperatures, to prevent warping or damage to the wooden components.
Fehlerbehebung
- Globe Not Rotating:
- Ensure the USB Type-C cable is securely connected to both the globe and a working power source.
- Check that the rotation control button is turned counter-clockwise to activate automatic rotation.
- Verify that all gears are correctly assembled and mesh smoothly without obstruction.
- LED Light Not Illuminating:
- Confirm the globe is receiving power via the USB Type-C connection.
- Check the internal wiring and connections of the LED module to ensure they are secure.
- Pieces Not Fitting During Assembly:
- Re-examine the instruction manual to confirm the correct orientation of the pieces.
- Use the provided sandpaper to gently remove any remaining burrs or excess material from the edges of the wooden pieces.
- Do not force pieces; gentle pressure should be sufficient if correctly aligned.
Technische Daten
| Modellnummer | RBT-ST003D |
| Abmessungen im zusammengebauten Zustand (ca.) | Height: 8.2 inches, Width: 6.6 inches, Base Length: 11.8 inches |
| Artikelgewicht | 2.4 Pfund |
| Stückzahl | 185 |
| Empfohlenes Alter | Ab 14 Jahren |
| Montagezeit (ca.) | 4.5 Stunden |
| Stromquelle | USB Type-C (cable included, adapter not included) |
| Hersteller | ROBOTIME |
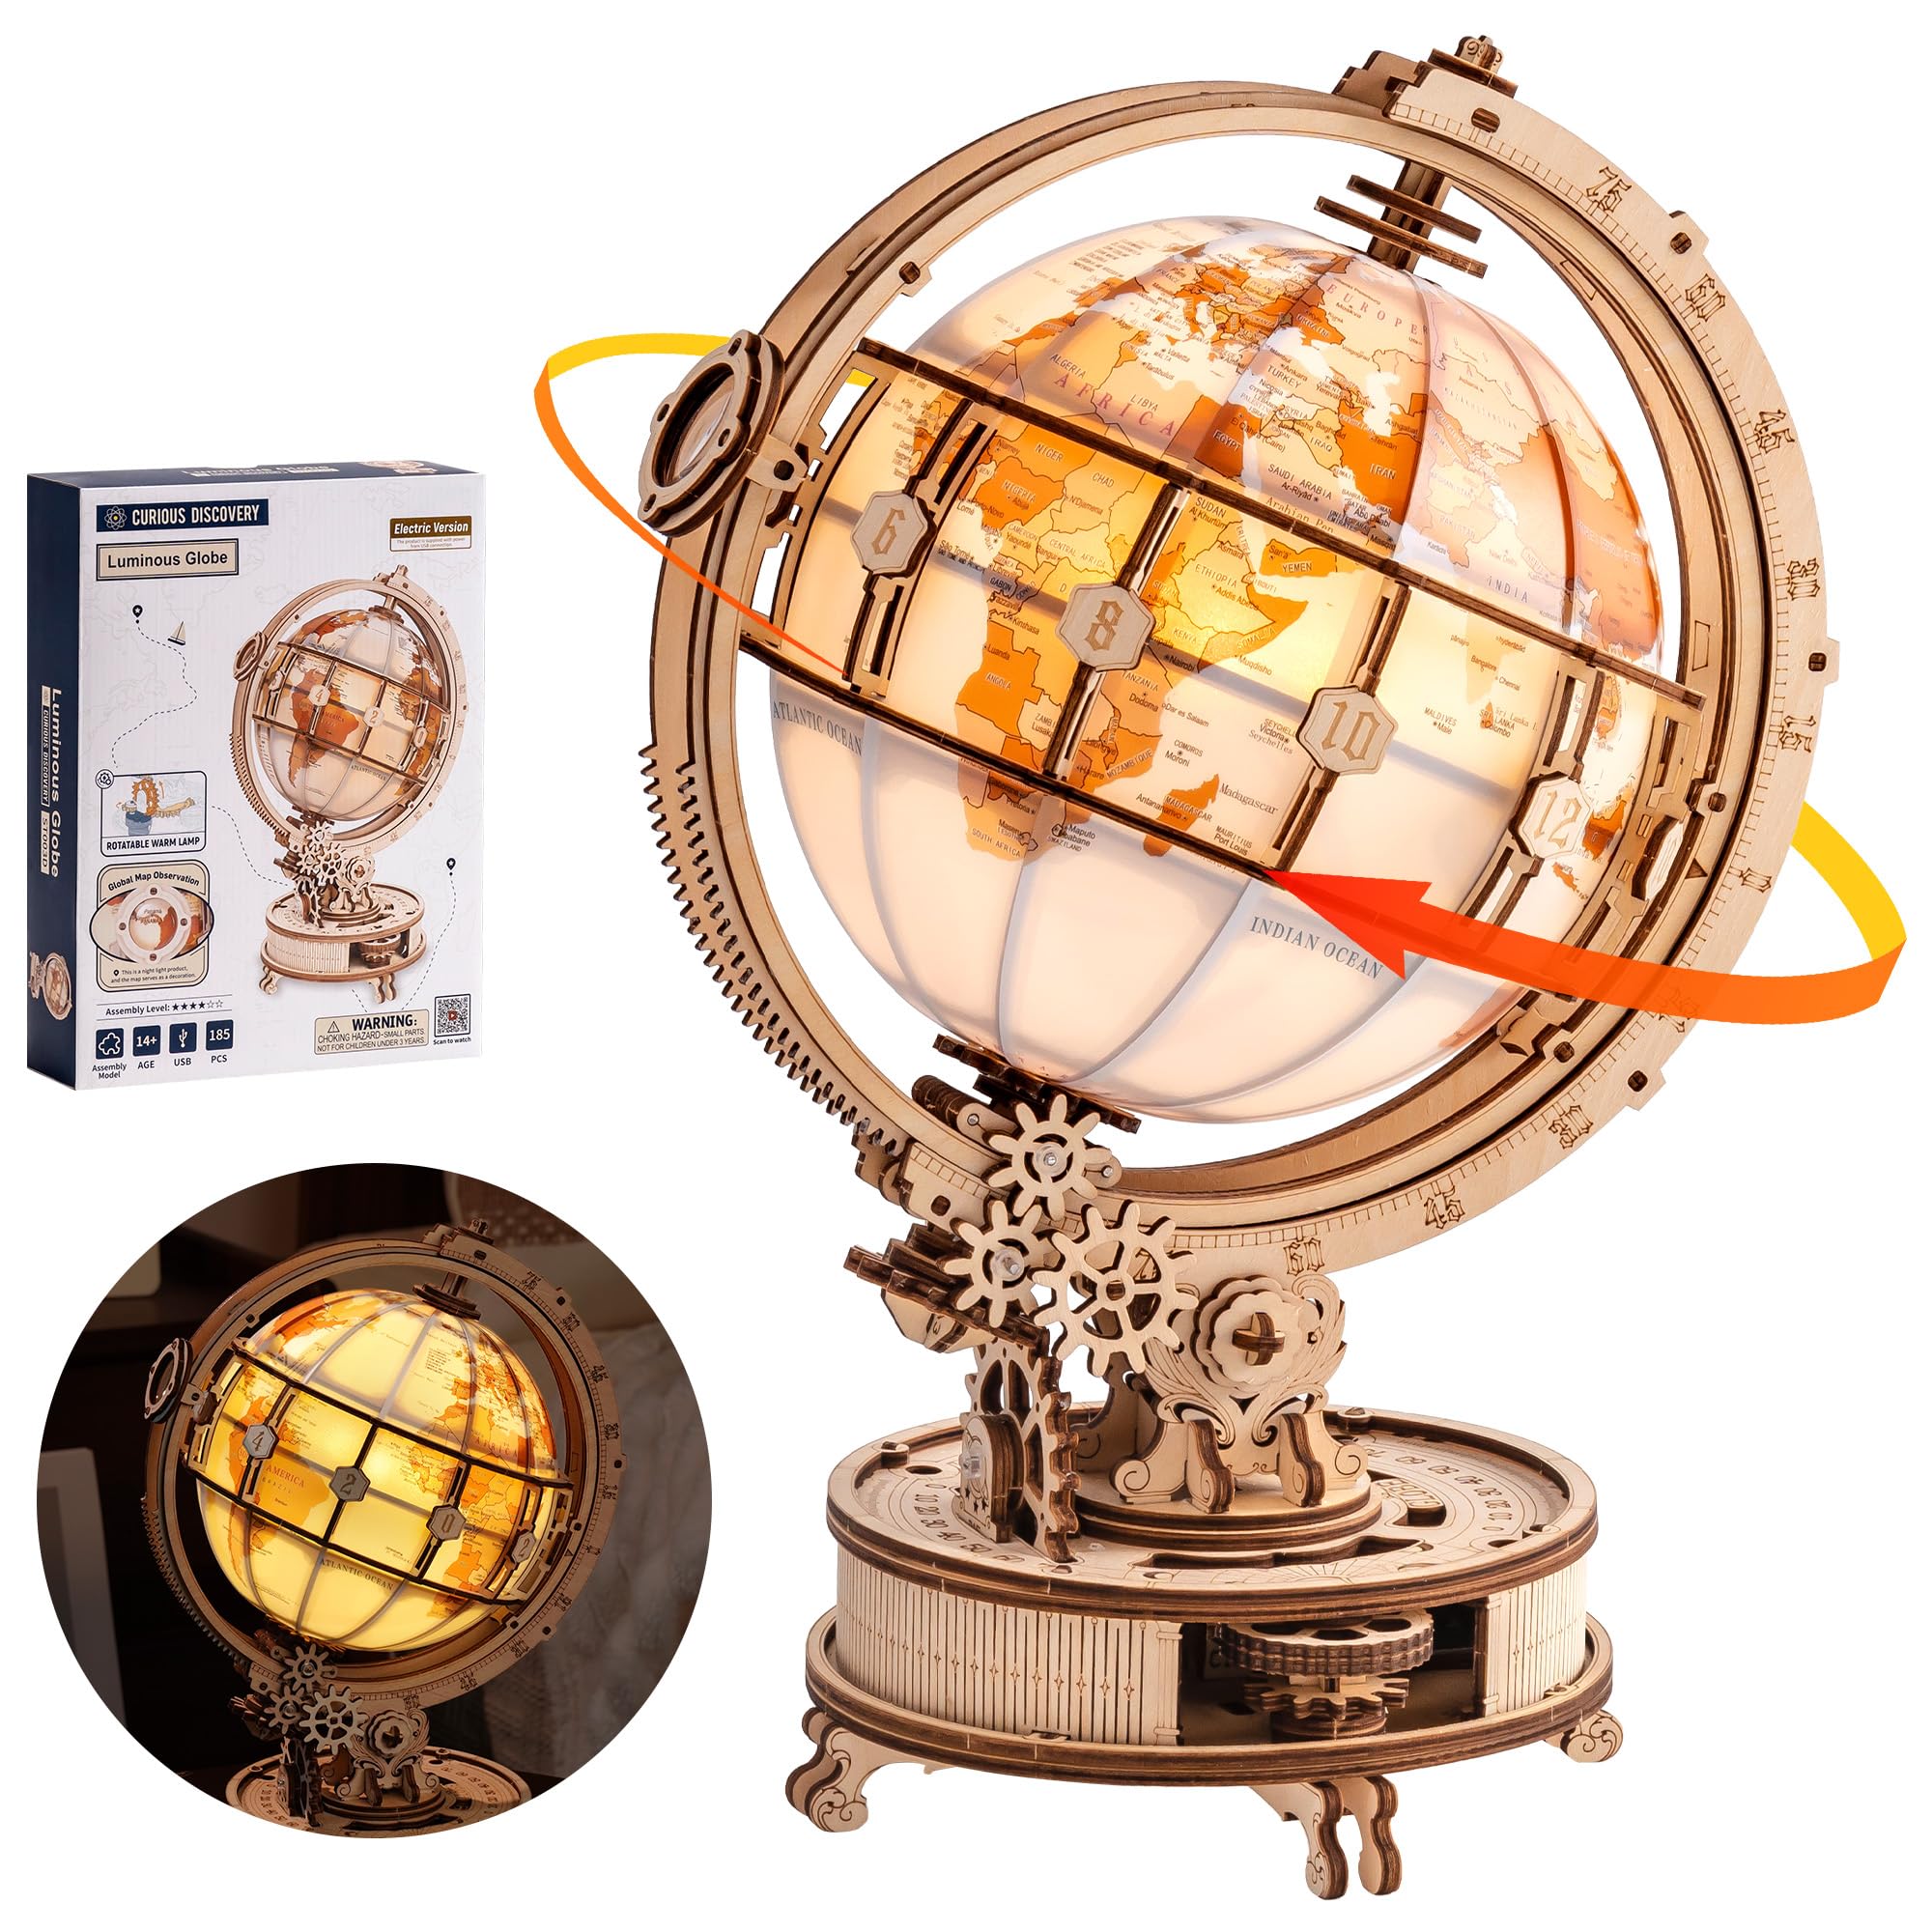
Image: Assembled ROBOTIME ST003 Luminous Globe 3D Wooden Puzzle with dimensions. This image displays the fully assembled globe, indicating its approximate height of 8.2 inches, width of 6.6 inches, and base length of 11.8 inches.
Garantie und Support
ROBOTIME is committed to customer satisfaction. We offer a replacement parts service. If any parts are damaged or missing during assembly, please contact our professional customer support team for assistance. We are ready to help ensure you are fully satisfied with your purchase and assembly experience.
For support, please refer to the contact information provided in your product packaging or visit the official ROBOTIME webWebsite.


